AN!CDB - Cluster Dashboard
|
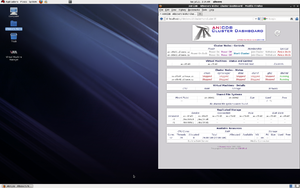
Alteeve Wiki :: AN!CDB - Cluster Dashboard |

AN!CDB, the Alteeve's Niche! Cluster Dashboard, is a management tool for clusters built following the 2-Node Red Hat KVM Cluster Tutorial.
It's first and foremost goal is to be extremely easy to use. No special skills or understanding of HA is required!
To achieve this ease of use, the cluster must be built to fairly specific requirements. Simplicity of use requires many assumptions be made.
AN!CDB provides;
- A single view of all cluster components and their current status.
- Control of the cluster nodes. Nodes can be:
- Powered On, Powered Off and Fenced
- Join to and withdrawn from the cluster
- Control of the virtual servers. Servers can be:
- Booted up, gracefully shut down and forced off
- Migrated between nodes
- Create, modify and delete servers;
- Create and upload installation and driver media
- Provision new servers, installing from media just like bare-iron servers
- Insert and Eject CD/DVD images
- Change allocated RAM and CPUs
- Delete servers that are no longer needed.
- Control of the cluster nodes. Nodes can be:
AN!CDB is designed to run on a machine outside of the cluster. The only customization needed is for the cluster name and the name of the nodes be added to the program. Once done, AN!CDB will collect and cache everything needed to control the cluster, even when both nodes are offline.
Installation
Installing AN!CDB is very easy now. The instructions are at the page below;
AN! generally installed the 'AN!CDB on ASUS EeeBox PC-EB1033 1-liter nettop PCs. You should be able to use any computer or appliance that can run the 64-bit version RHEL or CentOS version 6.
Using AN!CDB
Feel free to jump to the section you are interested in. The order below was compiled as a "story line" of how someone might use AN!CDB to "cold boot" a new Anvil!, create some servers, take a node out for maintenance, manage existing servers, boot a windows server off of the install disk for recovery, "cold stop" and Anvil! and delete servers.
All screen shots shown here were taken in late July 2013. AN!CDB is always evolving so what you see today may differ somewhat from what you see here.
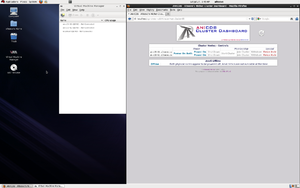
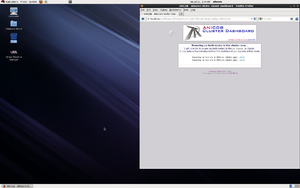
Connecting to the Dashboard

Open a web browser and browse to the dashboard. Here we will use the actual dashboard's desktop, so we will browse to http://localhost. If you connect from another computer, browse to the IP address or host name you setup for the dashboard.
When you first connect, you will be asked to log into the dashboard. The default user name is admin. There is no default password, but it usually set to the same password used when logging into the dashboard's desktop as the alteeve user.
If you do not know what the password is, please contact support. We can not recover your password, but we can help you reset it.
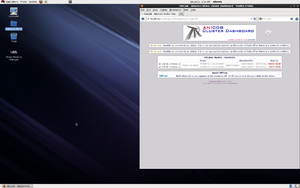
Choosing the Anvil! to Work On

If you have configured your dashboard to work on two or more Anvil!s, the first screen you see will ask you to select the one you wish to work on. This list is created by reading your /etc/an/an.conf file on the dashboard. By default, four fake entries are created. You will need to edit the an.conf configuration file to point to your Anvil!(s) before you can use the dashboard to control them.
If you have only one Anvil!, you will not see this screen.
If the dashboard sees only one Anvil! in the configuration file, it will automatically be selected.
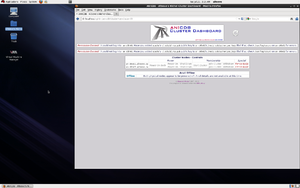
The Loading Screen

The dashboard does not cache or record an Anvil!'s state. Each time the dashboard needs to display information about the Anvil! and before performing an action on an Anvil!, the dashboard calls the nodes directly and checks their current state.
What this means is that you will frequently see the dashboard loading screen. This is an animated pinwheel asking you to wait while it gathers information.
When you see this screen, please be patient. The dashboard will wait up to 1 hour and 40 minutes, by default, for the cluster to return information. This is far longer than any action should take, of course. If you wait several minutes and the loading screen is still displayed, feel free to click on the "reload" icon to the right of the top logo.
"Cold Start" the Anvil!
If you Anvil! nodes are both powered off, you will see the "Cold Start" screen. If your dashboard is connected to the Anvil!'s "Back-Channel Network" (BCN), you will be given the option to turn on both nodes or just one node.
In almost all cases, you will want to start both nodes at the same time.
To start both nodes, simply click on the "Power On Both" button. Should you ever want to turn on just one of the nodes, click on the "Power On" button that is on the same line as the name of the node you wish to boot.
- 'Cold Start'
-
 "Cold Start" screen.
 -
 "Cold Start" confirmation screen.
 -
 "Cold Start" initiated screen.
 -
 "Cold Start" initiated; "No Access" screen.
 -
 "Cold Start" initiated; "Connection Refused" screen.
 -
 "Cold Start" complete, nodes are up.


Once you click on "Power on Both" or "Power On" for a single node, you will be asked to confirm the action. Click on the "Confirm" button and the dashboard will connect to each node's IPMI interface and ask it to boot the nodes.
After confirming the action, the dashboard will do an initial scan to make sure that the nodes can still be turned on. If someone else turned them on already, the dashboard will abort and tell you why. These checks are done because multiple people can use the dashboard at one time. In most cases though, your action will complete successfully.
If you go back to the main page before the nodes are booting, you will see one of two screens;
- "No Access"; This tells you that the dashboard can see that the node is powered up, but it was unable to connect via ssh to the node. This means that the node is still powering up, a process that can take several minutes on most modern hardware servers.
- "Connection Refused"; This tells you that the node's operating system is booting up, but not quite ready to accept ssh connections. The node should become accessible very soon. Click on the "refresh" icon at the top-right and you should be able to connect to the Anvil! in just a moment.
Start the Cluster Stack
Installing Server Operating Systems
KVM/QEMU maintained list of tested guest OS.
Windows 7
Windows 7 Professional has a limit of two sockets. The hypervisor presents each core as a socket, so Windows 7 will only use up to two cores.
Solaris 11
There is a harmless but verbose bug when using Solaris 11. You will see errors like:
WARNING: /pci@0,0/pci1af4,1100@1,2 (uhci0): No SOF interrupts have been received
, this USB UHCI host controller is unusable
Ignore this until the install is complete. Once the OS is installed, run:
rem_drv uhci
The errors will no longer appear.
Solution found here.
| Any questions, feedback, advice, complaints or meanderings are welcome. | |||
| Alteeve's Niche! | Alteeve Enterprise Support | Community Support | |
| © 2025 Alteeve. Intelligent Availability® is a registered trademark of Alteeve's Niche! Inc. 1997-2025 | |||
| legal stuff: All info is provided "As-Is". Do not use anything here unless you are willing and able to take responsibility for your own actions. | |||