Anvil! m2 Tutorial: Difference between revisions
| Line 96: | Line 96: | ||
{|style="width: 100%;" | {|style="width: 100%;" | ||
!colspan="2"|UPSes | !colspan="2"|UPSes | ||
|- | |- | ||
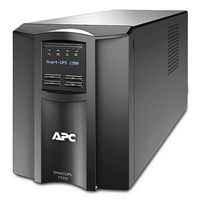
|style="width: 710px"|[[image:APC_SMT1500RM2U_Front-Right.jpg|thumb|left|700px|APC [http://www.apc.com/products/resource/include/techspec_index.cfm?base_sku=SMT1500RM2U SmartUPS 1500 RM2U] 120vAC UPS. Photo by [http://www.apcmedia.com/prod_image_library/index.cfm?search_item=SMT1500RM2U APC].]] | |||
|[[image:APC SMT1500_Front-Right.jpg|thumb|center|200px|APC [http://www.apc.com/products/resource/include/techspec_index.cfm?base_sku=SMT1500 SmartUPS 1500 Pedestal] 120vAC UPS. Photo by [http://www.apcmedia.com/prod_image_library/index.cfm?search_item=SMT1500 APC].]] | |||
|- | |||
!colspan="2"|Switched PDUs | |||
|- | |||
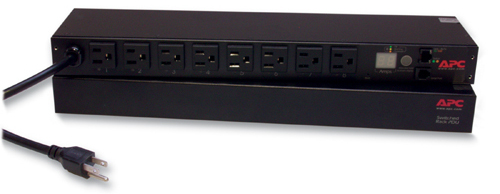
|style="width: 710px"|[[image:APC_AP7900_Front-Right.jpg|thumb|left|500px|APC [http://www.apc.com/products/resource/include/techspec_index.cfm?base_sku=AP7900 AP7900 8-Outlet 1U] 120vAC PDU. Photo by [http://www.apcmedia.com/prod_image_library/index.cfm?search_item=AP7900# APC].]] | |||
|[[image:APC_AP7931_Front-Right.jpg|thumb|center|100px|APC [http://www.apc.com/products/resource/include/techspec_index.cfm?base_sku=AP7900 AP7931 16-Outlet 0U] 120vAC PDU. Photo by [http://www.apcmedia.com/prod_image_library/index.cfm?search_item=AP7931# APC].]] | |||
|- | |||
!colspan="2"|Network Switches | |||
|- | |||
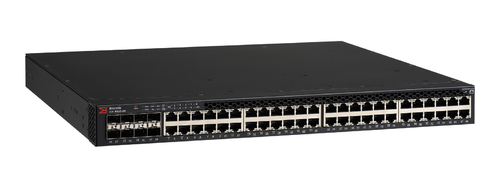
|style="width: 510px"|[[image:Brocade_icx6610-48_front-left.png|thumb|left|500px|Brocade [http://www.brocade.com/products/all/switches/product-details/icx-6610-switch/index.page ICX6610-48] 8x SFP+, 48x 1Gbps RJ45, 160Gbit stacked switch. Photo by [http://newsroom.brocade.com/Image-Gallery/Product-Images Brocade].]] | |||
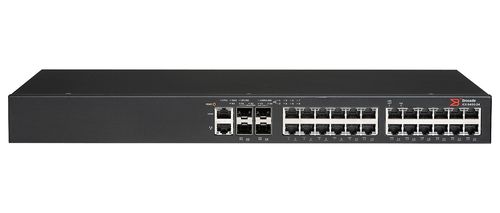
|[[image:Brocade_icx6450-25_front_01.jpg|thumb|left|500px|Brocade [http://www.brocade.com/products/all/switches/product-details/icx-6430-and-6450-switches/index.page ICX6450-48] 4x SFP+, 24x 1Gbps RJ45, 40Gbit stacked switch. Photo by [http://newsroom.brocade.com/Image-Gallery/Product-Images Brocade].]] | |||
|} | |} | ||
Revision as of 00:46, 29 December 2014
| Warning: This tutorial is NOT complete! It is being written using Striker version 1.2.0 β. Things may change between now and final release. |
What is an 'Anvil!', Anyway?
Simply put;
- The Anvil! is a high-availability cluster platform for hosting virtual machines.
Slightly less simply put;
- The Anvil! is;
- Exceptionally easy to build and operate.
- A pair of "nodes" that work as one to host one or more highly-available (virtual) servers in a manner transparent to the servers.
- Hosted servers can live-migrate between nodes, allowing business-hours maintenance of all systems without downtime.
- Existing expertise and work-flow are almost 100% maintained requiring almost no training for staff and users.
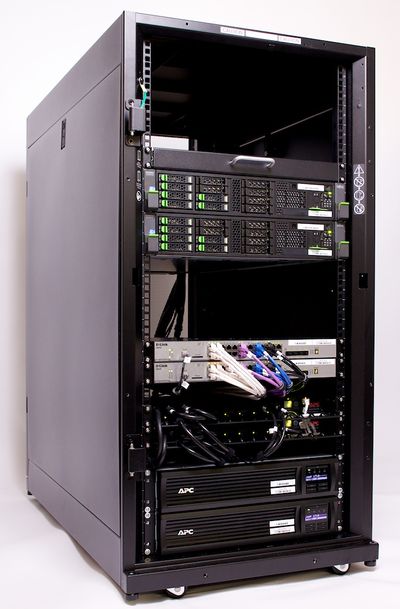
- A "Foundation Pack" of fault-tolerant network switches, switched PDUs and UPSes. Each Foundation pack can support one or more "Compute Pack" node pairs.
- A pair of "Striker" dashboard management and support systems which provide very simple, web-based management on the Anvil! and it's hosted servers.
- A "Scan Core" monitoring and alert system tightly couple to all software and hardware systems that provides fault detection, predictive failure analysis, and environmental monitoring with an early-warning system.
- Optionally, "Scan Core" can automatically, gracefully shut down an Anvil! and it's hosted servers in low-battery and over-temperature events as well as automatically recovery when safe to do so.
- Optional commercial supported with 24x7x365 monitoring, installation, management and customization services.
- 100% open source (GPL v2+ license) with HA systems built to be compliant with Red Hat support.
- No vendor lock-in.
- Entirely COTS equipment, entirely open platform. You are always free to shift vendors at any time.
Pretty darn impressive, really.
What This Tutorial Is
This is meant to be a quick to follow project.
It assumes no prior experience with Linux, High Availability clustering or virtual servers. It does require a basic understanding of things like networking, but as few assumptions as possible are made about prior knowledge.
What This Tutorial Is Not
Unlike the main tutorial, this tutorial is not meant to give the reader an in-depth understanding of High Availability concepts.
Likewise, it will not go into depth on why the Anvil! is designed the way it is.
It will not go into a discussion of how and why you should choose hardware for this project, either.
All this said, this tutorial will try to provide links to the appropriate sections in the main tutorial as needed. So if there is a point where you feel lost, please take a break and follow those thinks.
What is Needed?
| Note: We are an unabashed Fujitsu, Brocade and APC reseller. No vendor is perfect, of course, but we've selected these companies for their high quality build standards and excellent post-sales support. You are, of course, perfectly able to substitute in any hardware you like, just so long as it meets the system requirements listed. |
Some system requirements;
(All equipment must support RHEL version 6)
A machine for Striker
A server? An appliance!
 |
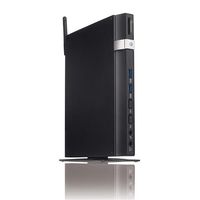 |
The Striker dashboard has very low performance requirements. If you build two dashboards, then no redundancy in the dashboard itself is required as each will provide backup for the other.
We have used;
- Very light-weight machines like the ASUS EeeBox with a simple Apple USB ethernet adapter.
- On the other end of the scale, we've used fully redundant Fujitsu Primergy RX 1330 M1 servers with four network interfaces. The decision here will be principally guided by your budget.
If you use a pair on non-redundant "appliance" machines, be sure to stager each of them across the two power power rails and network switches.
A Pair of Anvil! Nodes
The more fault-tolerant, the better!
 |
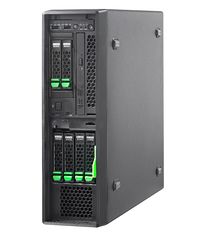 |
The requirements are two servers with the following;
- A CPU with hardware-accelerated virtualization
- Redundant power supplies
- IPMI or vendor-specific out-of-band management, like Fujitsu's iRMC, HP's iLO, Dell's iDRAC, etc
- Six network interfaces, 1 Gbit or faster (yes, six!)
- 4 GiB of RAM and 44.5 GiB of storage for the host operating system, plus sufficient RAM and storage for your servers
Beyond these requirements, the rest is up to you; your performance requirements, your budget and your desire for as much fault-tolerance as possible.
| Note: If you have a bit of time, you should really read the section discussing hardware considerations from the main tutorial before purchasing hardware for this project. It is very much not a case of "buy the most expensive and you're good". |
Foundation Pack
The foundation pack is the bedrock that the Anvil! node pairs sit on top of.
| UPSes | |
|---|---|
 |
 |
| Switched PDUs | |
 |
 |
| Network Switches | |
 |
 |
It is easy, and actually critical, that the hardware you select be fault-tolerant. The trickiest part is ensuring your switches can fail back and forth without interrupting traffic, a concept called "hitless fail-over". The power is, by comparison, much easier to deal with.
You will need;
- Two UPSes (Uninterruptable Power Supplies) with enough battery capacity to run your entire Anvil! for your minimum no-power hold up time.
- Two switched PDUs (Power Distribution Units) (basically network-controller power bars)
- Two network switches with hitless fail-over support, if stacked.
What is the Build Process?
The core of the Anvil!'s support and management is the Striker dashboard. It will become the platform off of which nodes and other dashboards are built from.
So the build process consists of:
Setup the First Striker Dashboard
If you're not familiar with installing Linux, please don't worry. It is quite easy and we'll walk through each step carefully.
- Build the first Striker dashboard
- Do a minimal install off of a standard RHEL 6 install disk.
- Grab the Striker install script and run it.
- Load up the Striker Web Interface.
Preparing the Anvil! Nodes
It's rather difficult to borderline-impossible to fully automate the install process, but Striker does automate the vast majority of it, and it simplifies the few manual parts. The main goal of this stage is to get an operating system onto the nodes so that the web-based installer can take over.
| Any questions, feedback, advice, complaints or meanderings are welcome. | |||
| Alteeve's Niche! | Enterprise Support: Alteeve Support |
Community Support | |
| © Alteeve's Niche! Inc. 1997-2024 | Anvil! "Intelligent Availability®" Platform | ||
| legal stuff: All info is provided "As-Is". Do not use anything here unless you are willing and able to take responsibility for your own actions. | |||

