Install and Configure AN!CDB: Difference between revisions
| Line 126: | Line 126: | ||
<syntaxhighlight lang="text"> | <syntaxhighlight lang="text"> | ||
The authenticity of host '[an-c05n01]:22501 ([ | The authenticity of host '[an-c05n01]:22501 ([10.255.50.1]:22501)' can't be established. | ||
RSA key fingerprint is | RSA key fingerprint is c4:5f:3d:52:d8:76:2d:0b:b0:9c:b5:e4:9d:ac:05:a1. | ||
</syntaxhighlight> | </syntaxhighlight> | ||
<syntaxhighlight lang="text"> | <syntaxhighlight lang="text"> | ||
| Line 133: | Line 133: | ||
</syntaxhighlight> | </syntaxhighlight> | ||
<syntaxhighlight lang="text"> | <syntaxhighlight lang="text"> | ||
Warning: Permanently added '[an-c05n01]:22501,[ | Warning: Permanently added '[an-c05n01]:22501,[10.255.50.1]:22501' (RSA) to the list of known hosts. | ||
</syntaxhighlight> | </syntaxhighlight> | ||
| Line 150: | Line 150: | ||
</syntaxhighlight> | </syntaxhighlight> | ||
<syntaxhighlight lang="bash"> | <syntaxhighlight lang="bash"> | ||
Last login: | Last login: Tue Dec 3 21:23:48 2013 from alteeve.ca | ||
an-c05n01:~# | an-c05n01:~# | ||
</syntaxhighlight> | </syntaxhighlight> | ||
| Line 191: | Line 191: | ||
<syntaxhighlight lang="text"> | <syntaxhighlight lang="text"> | ||
The authenticity of host '[an-c05n01]:22501 ([ | The authenticity of host '[an-c05n01]:22501 ([10.255.50.1]:22501)' can't be established. | ||
RSA key fingerprint is | RSA key fingerprint is c4:5f:3d:52:d8:76:2d:0b:b0:9c:b5:e4:9d:ac:05:a1. | ||
</syntaxhighlight> | </syntaxhighlight> | ||
<syntaxhighlight lang="text"> | <syntaxhighlight lang="text"> | ||
| Line 198: | Line 198: | ||
</syntaxhighlight> | </syntaxhighlight> | ||
<syntaxhighlight lang="text"> | <syntaxhighlight lang="text"> | ||
Warning: Permanently added '[an-c05n01]:22501,[ | Warning: Permanently added '[an-c05n01]:22501,[10.255.50.1]:22501' (RSA) to the list of known hosts. | ||
Last login: Sun Jul 28 20:43:46 2013 from alteeve.ca | Last login: Sun Jul 28 20:43:46 2013 from alteeve.ca | ||
an-c05n01:~# | an-c05n01:~# | ||
Revision as of 02:52, 4 December 2013
|
Alteeve Wiki :: How To :: Install and Configure AN!CDB |
| Note: Once you finish installing AN!CDB, please visit the tutorial AN!CDB - Cluster Dashboard for information on how to use AN!CDB. |
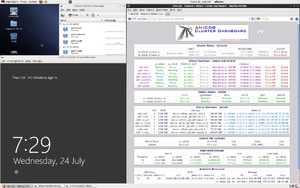
Install
The easiest way to setup AN!CDB is to use the an-cdb-install.sh script.
Install CentOS or RHEL version 6.x on your dashboard server. Configure the network interfaces so that the dashboard can connect to the IFN and BCN.
Once the network is setup and the install is complete, download this file;
curl -O https://raw.github.com/digimer/an-cdb/master/an-cdb-install.sh
chmod 755 an-cdb-install.sh
#
  % Total    % Received % Xferd  Average Speed   Time    Time     Time  Current
                                 Dload  Upload   Total   Spent    Left  Speed
100  9065  100  9065    0     0  35571      0 --:--:-- --:--:-- --:--:--  134k
Next, simply run the script.
You will be asked for the host name, a password to use for the alteeve user's login and the dashboard's admin login and you will be asked for a company or organization name. The company or organization name is simply used for the dashboard's password prompt.
./an-cdb-install.sh
##############################################################################
# AN!CDB - Alteeve's Niche! - Cluster Dashboard                              #
#                                                          Install Beginning #
##############################################################################

What is the host name of this dashboard?
[an-m04.alteeve.ca]

NOTE: The password you enter will be echoed back to you.
What password do you want for the local 'alteeve' user and for the dashboard's
'admin' user?
[] secret

What is the company or organization to use for the Dashboard password prompt?
[] Alteeve's Niche!

Using the following values:
 - Host name: [an-m04.alteeve.ca]
 - Customer:  [Alteeve's Niche!]
 - Password:  [secret]

Shall I proceed? [y/N]
y
 - Beginning now.
After a fairly large amount of output, you should see:
##############################################################################
#                                                                            #
#                       Dashboard install is complete.                       #
#                                                                            #
# When you reboot and log in, you should see a file called:                  #
# [public_keys.txt] on the desktop. Copy the contents of that file and add   #
# them to: [/root/.ssh/authorized_keys] on each cluster node you wish this   #
# dashboard to access.                                                       #
#                                                                            #
# Once the keys are added, switch to the: [apache] user and use ssh to       #
# connect to each node for the first time. This is needed to add the node's  #
# SSH fingerprint to the apache user's: [~/.ssh/known_hosts] file. You only  #
# need to do this once per node.                                             #
#                                                                            #
# Please reboot to ensure the latest kernel is being used.                   #
#                                                                            #
# Remember to update: [/etc/an/an.conf] and then copy it to each node!       #
#                                                                            #
##############################################################################
This will usually update the kernel and install the graphical desktop. Generally, you will want to reboot at this point.
As it says above, remember to edit the /var/www/home/ricci_pw.txt and /etc/an/an.conf files to add the information for the Anvil!s you want this dashboard to have access to.
Also remember to log into the apache user's terminal and SSH to each node. This will ask you to verify the node's fingerprint and then record it in the apache user's /var/www/home/.ssh/known_hosts file. The dashboard will not connect to a node until this is done.
AN! generally installed the AN!CDB on ASUS EeeBox PC-EB1033 1-liter nettop PCs. You should be able to use any computer or appliance that can run the 64-bit version RHEL or CentOS version 6.
Adding an Anvil! to a Dashboard
Adding an Anvil! to a given dashboard involves a few steps;
- Adding the Anvil! nodes to /etc/hosts
- Configure /etc/ssh/ssh_config is you use non-standard ports.
- Setting up SSH access from the dashboard to your nodes.
- Adding the Anvil!'s details to the dashboard's /etc/an/an.conf file.
- Copy /etc/an/an.conf to your Anvil! nodes.
- Adding each node to the dashboard's Virtual Machine Manager application.
Adding the AN!CDB SSH keys to the Nodes
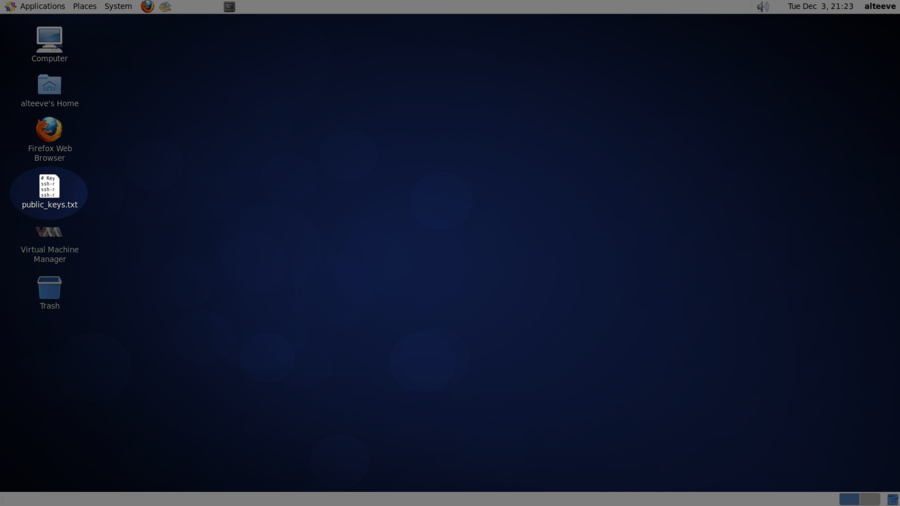
When the dashboard was installed, a desktop file should have been created called public_keys.txt. This file contains the keys needed to provide password-less SSH access for the dashboard's apache, alteeve and root users. Strictly speaking, the only key you need to add to the nodes is the apache user. The dashboard can not authenticate against a node otherwise (at this time... patches welcomed!).
Adding the alteeve user's key allows Virtual Machine Manager to connect without having to enter a password. If you prefer though, you can leave out the alteeve. Adding the root user's key may come in handy if you use the dashboard machine as a gateway into the cluster. Adding the root user's key is the least important and safe to leave out if you prefer.
Open a terminal window as the alteeve user. To do this, log into the dashboard's graphical interface and the open a terminal window by clicking on;
- Applications -> System Tools -> Terminal
At the prompt, type the following;
cat /home/alteeve/Desktop/public_keys.txt | ssh root@an-c05n01 "cat >> /root/.ssh/authorized_keys"
You will be asked to verify the node's SSH fingerprint. If you trust the fingerprint is accurate, type yes.
The authenticity of host '[an-c05n01]:22501 ([10.255.50.1]:22501)' can't be established.
RSA key fingerprint is c4:5f:3d:52:d8:76:2d:0b:b0:9c:b5:e4:9d:ac:05:a1.
Are you sure you want to continue connecting (yes/no)? yes
Warning: Permanently added '[an-c05n01]:22501,[10.255.50.1]:22501' (RSA) to the list of known hosts.
The node's fingerprint will be added to the alteeve user's ~/.ssh/known_hosts file. You should not be asked to verify the fingerprint again.
Next, you will need to enter to node's root user's password.
root@an-c05n01's password:
When you enter the password, you will so no feedback at all. If you entered the correct password, it should simply have returned to the terminal. You can verify that this worked by trying to log into the node.
ssh root@an-c05n01
Last login: Tue Dec  3 21:23:48 2013 from alteeve.ca
an-c05n01:~#
Now exit out to return to the dashboard's terminal.
an-c05n01:~# exit
logout
Connection to an-c05n01 closed.
Now switch to the apache user.
su - apache
Enter the apache user's password. This was set when you ran the an-cdb-installer.sh script. There is no default password.
Password:
If the password was correct, you will get the apache user's shell.
-bash-4.1$
Now try using ssh to connect to the node.
ssh root@an-c05n01
As this is a different user, you will again be asked to verify that the SSH fingerprint is accurate. If you trust it, type yes.
The authenticity of host '[an-c05n01]:22501 ([10.255.50.1]:22501)' can't be established.
RSA key fingerprint is c4:5f:3d:52:d8:76:2d:0b:b0:9c:b5:e4:9d:ac:05:a1.
Are you sure you want to continue connecting (yes/no)? yes
Warning: Permanently added '[an-c05n01]:22501,[10.255.50.1]:22501' (RSA) to the list of known hosts.
Last login: Sun Jul 28 20:43:46 2013 from alteeve.ca
an-c05n01:~#
Now type exit to return to the dashboard.
exit
logout
Connection to an-c05n01 closed.
That's it!
Repeat this process for your other node, an-c05n02 in this case.
Configuring 'an.conf'
The an.conf file is where you tell AN!CDB which Anvil!s your dashboard will be able to manage.
By default, four sample Anvil!s are pre-loaded in the config. Each Anvil has found variables that need to be set;
- name; This is the Anvil!'s cluster name. If you don't know the cluster name, you can find it on either node at the top of the cluster.conf file in the <cluster ... name="..."> element. If you have console access to one of the nodes, you can run this slightly odd looking bash command;
cat /etc/cluster/cluster.conf |grep "<cluster " |sed 's/<cluster .*name="\(.*\)".*/\1/'
an-cluster-05
- nodes; This is a comma-separated list of the node names. These are the names (or IPs) that the dashboard will call when connecting to the nodes. So please be sure that the names resolve to the proper IPs. Usually, the names should resolve to the cluster's BCN. In most Anvil!s, the short host name can be used to resolve each node's BCN network IP address. If this is true for you as well, then you can get the host names this way;
cat /etc/cluster/cluster.conf |grep "<clusternode " |perl -pe 's/^.*name="(.*?)[\."].*/\1/' | sed ':a;N;$!ba;s/\n/, /g'
an-c05n01, an-c05n02
- company; This is a free-form descriptive field that you can fill out however you wish. The value here is used in the second column of the Anvil! selection screen. Generally, it is the company, institution or organization name that owns the Anvil!.
- description; This is also a free-form descriptive field that you can fill out however you wish. The value here is used in the third column of the Anvil! selection screen. Generally this is some descriptive field used for the informal name of the Anvil!, where it physically is located, etc.
The format of the an.conf configuration file is cluster::X::variable where N is some unique number. The order of the numbers does not matter at all, it simply provides a method of distinguishing the values of one Anvil! from another.
So, by default, the first two sample Anvil! configurations are;
cluster::1::name		=	an-cluster-01
cluster::1::nodes		=	an-c01n01, an-c01n02
cluster::1::company		=	Alteeve's Niche!
cluster::1::description		=	Cluster 01

cluster::2::name		=	cc-cluster-01
cluster::2::nodes		=	cc-c01n01.remote, cc-c01n02.remote
cluster::2::company		=	Another Company
cluster::2::description		=	Cluster 01 (in DC)
If you have only one Anvil!, you can simply delete the three other sample entries. Then you can replace the values in the remaining one with the details on your Anvil!.
There is no (practical) upper limit to the number of Anvil!s that a given dashboard can support.
Configuring 'ricci_pw.txt'
In order for AN!CDB to add or remove servers, it must be able to authenticate against the cluster stack. The cluster stack has it's own password for this purpose. This password is set by assigning a password to each node's ricci system account.
The dashboard keeps these passwords separate from the general Anvil! configuration found in an.conf. These passwords instead are saved in /var/www/home/ricci_pw.txt.
This configuration file is much more simple to configure. You need to set the variable name to the cluster name that you set in an.conf's cluster::X::name value. The password for that Anvil! is on the right, separated by an = sign.
So continuing our example above, the Anvil!'s cluster name was an-cluster-05. The ricci password on this Anvil! is secret. So the ricci_pw.txt entry would be:
an-cluster-05 = "secret"
Note that simple passwords do not need to be in double-quotes. However, if your password is complex and has special characters or spaces, the double-quotes are needed to ensure that the password is parsed properly.
You can put as many Anvil! entries in this file as you wish. Simply ensure that each entry is on it's own line.
Configuring Virtual Machine Manager
The Virtual Machine Manager application is a separate tool that is available on the AN!CDB appliances. You can think of it as a kind of KVM switch for your server running on your Anvil!s.
It gives you a way to directly access your servers, just as if you were sitting at a real keyboard, mouse and monitor plugged into a physical server. With it, you can watch your servers boot up, shut down and you can work on your servers when they have no network connection at all.
Normal remote management tools, like RDP for windows servers, SSH for Linux and UNIX and other tools require that the target server be up and running and have a working network connection. Most of the time, these are perfectly fine. Sometimes though, network settings are configured improperly, bad firewall rules lock out remote access and so on. These time require direct access and that is where Virtual Machine Manager comes in very handy.
| Virtual Machine Manager | ||
|---|---|---|
 |
 | |
 |
 |
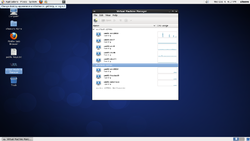 |
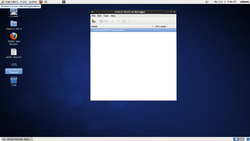
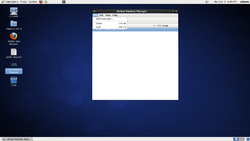
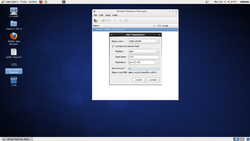
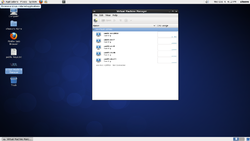
The steps to add the nodes are (in the same order as the images above);
- On the dashboard's desktop is an icon called "Virtual Machine Manager".
- Double-click on it and it will start the program.
- Click on "File" -> "Add Connection"
- Fill in the details for the first node in your Anvil!.
- Click to check "Connect to remote host"
- Enter the host name of the node (same as you put in an.conf earlier)
- Click to check "Autoconnect"
- Clock on "Connect".
- The first node should appear in the main window. If you already have servers running on that node, they will appear. Otherwise they will appear when they are booted or created.
- Repeat steps #3 and #4 to add the second node.
That's it! You now have direct access to your servers. Simply run "Virtual Machine Manager" when ever you want. It's use is totally independent of the AN!CDB dashboard proper.
| Any questions, feedback, advice, complaints or meanderings are welcome. | |||
| Alteeve's Niche! | Alteeve Enterprise Support | Community Support | |
| © 2025 Alteeve. Intelligent Availability® is a registered trademark of Alteeve's Niche! Inc. 1997-2025 | |||
| legal stuff: All info is provided "As-Is". Do not use anything here unless you are willing and able to take responsibility for your own actions. | |||

