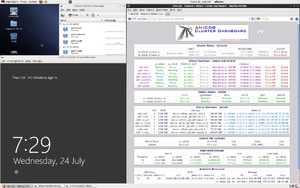
Install and Configure AN!CDB

This mini tutorial will show you how to install AN!CDB; The AN! Cluster Dashboard.
The easiest way to setup AN!CDB is to use the an-cdb-install.sh script.
Install CentOS or RHEL version 6 on your dashboard server. Configure the network interfaces so that the dashboard can connect to the IFN and BCN.
Once the network is setup and the install is complete, download this file;
curl -O https://alteeve.ca/files/an-cdb-install.sh
chmod 755 an-cdb-install.sh
#
  % Total    % Received % Xferd  Average Speed   Time    Time     Time  Current
                                 Dload  Upload   Total   Spent    Left  Speed
100  5609  100  5609    0     0  37451      0 --:--:-- --:--:-- --:--:--  238k
Once you have save the install script, edit it with your favourite text editor and change the following;
vi an-cdb-install.sh
# Change the following variables to suit your setup.
PASSWORD="secret"
HOSTNAME="an-m03.alteeve.ca"
CUSTOMER="Alteeve's Niche!"
Once the changes are saved, run the script. It could take quite a while to complete depending on how slow your dashboard machine is, how slow your internet connection is and how much needs to be downloaded.
./an-cdb-install.sh
##############################################################################
# AN!CDB - Alteeve's Niche! - Cluster Dashboard                              #
#                                                          Install Beginning #
##############################################################################

I will set the dashboard's 'admin' user and the local 'alteeve' user passwords
to: [secret]

I will set the hostname for this dashboard to: [an-m03.alteeve.ca]

I will set the client's company name on the dashboard's login prompt to:
[Alteeve's Niche!]

Shall I proceed? (1 -> Yes, 2 -> No)
1) Yes
2) No
#? 1
 - Beginning now.

<snip>

##############################################################################
#                                                                            #
#                       Dashboard install is complete.                       #
#                                                                            #
# When you reboot and log in, you should see a file called:                  #
# [public_keys.txt] on the desktop. Copy the contents of that file and add   #
# them to: [/root/.ssh/authorized_keys] on each cluster node you wish this   #
# dashboard to access.                                                       #
#                                                                            #
# Once the keys are added, switch to the: [apache] user and use ssh to       #
# connect to each node for the first time. This is needed to add the node's  #
# SSH fingerprint to the apache user's: [~/.ssh/known_hosts] file. You only  #
# need to do this once per node.                                             #
#                                                                            #
# Please reboot to ensure the latest kernel is being used.                   #
#                                                                            #
# Remember to update: [/var/www/home/ricci_pw.txt] and: [/etc/an/an.conf]!!  #
#                                                                            #
##############################################################################
generally, this will update the kernel and/or install the graphical desktop. Generally you will want to reboot at this point.
As it says above, remember to edit the /var/www/home/ricci_pw.txt and /etc/an/an.conf files to add the information for the Anvil!s you want this dashboard to have access to.
Also remember to log into the apache user's terminal and SSH to each node. This will ask you to verify the node's fingerprint and then record it in the apache user's /var/www/home/.ssh/known_hosts file. The dashboard will not connect to a node until this is done.
| Any questions, feedback, advice, complaints or meanderings are welcome. | |||
| Alteeve's Niche! | Enterprise Support: Alteeve Support |
Community Support | |
| © Alteeve's Niche! Inc. 1997-2024 | Anvil! "Intelligent Availability®" Platform | ||
| legal stuff: All info is provided "As-Is". Do not use anything here unless you are willing and able to take responsibility for your own actions. | |||