3+ Node CentOS5 Cluster + SoftSAN
|
Alteeve Wiki :: How To :: 3+ Node CentOS5 Cluster + SoftSAN |
NOTE: This is a new How-To and it is not finished. Until this warning is removed, consider this document very flawed and unsuitable for use.
Feb. 19, 2010: Currently, my 2-Node CentOS5 Cluster How-To is getting all my attention. If you're looking to create a 2-Node cluster, please check it out and let me know what you think.
Overview
The goal of this How-To is to build a 3+ node cluster where each node's disk space comes from a home-brew SAN slice.
Specifically, this is an extension to the 2-Node CentOS5 Cluster How To. In practice, the SAN would be a stand-alone 2-node cluster to provide high availability of the SAN to the main cluster, but to keep things simple, and to reduce the hardware needed for you to follow along, it will be a simple disk in this How-To.
The cluster itself will comprise of four nodes. I will start with three node and then show how to add in the fourth to simulate growing your cluster as your resource requirements grow.
What You Should Know
I will try to assume as little as possible in this How-To. However, a certain base-level of knowledge is expected.
Specifically, you will need to know;
- The bash command line.
- Your way around CentOS or Red Hat.
- Basic RPM package management.
- An understanding of TCP/IP networking and network configuration under CentOS
- Data storage under Linux (fdisk, md, LVM, etc)
The SAN
The SAN will be the centralized data store all cluster nodes will use. The idea is that a node can come or go and another node can slide into a dead node's place easily by simply accessing the dead node's data on the SAN. It also simplifies allocating various amounts of disk space to nodes as their storage needs change over time.
SoftSAN?
This is just my term for a "home brew" SAN server. If you have the resources, dedicated SAN hardware would be preferred. However, I don't think you should not be able to implement a flexible, robust cluster simply due to lack of resources! You just need to put more elbow grease into it.
Terminology
In iSCSI SAN parlance, we are building an iSCSI target.
References and Resources
KISSing the SAN
As said earlier, you would probably want to build a SAN server that has as few single points of failure as possible. A reasonable and reasonably inexpensive approach would be a 2-node cluster with each node having two dedicated NICs to two seperate switches dedicated to data traffic.
For the case of this paper though, I will use a single server with a single '/dev/sdX' device. You should be able to simply replace '/dev/sdX' with '/dev/drbdX' in practice. I recommend though, for your first attempt, keep it simple. Get things working and then "do it right".
Remember, "Keep It Simple, Silly"!
OS Install
Start with a basic CentOS install. If you'd like to mimic the install used for this paper, here is my 'anaconda-ks.cfg', renamed as 'san01.ks' for you to use as a kickstart script. Before you can use it though, edit it to set your hostname and to use your password hash.
The main thing to remember in your OS install is to keep it simple. I generally start with as minimal install as possible and install packages I need via RPM as I go.
Setup
LVM
First, setup you disk, array or clusters disk however you want. For simplicity sake, I will continue this example using a simple single hard drive. This is adequate for learning, but not very practical in practice. The nice thing is that you can simply substitute /dev/sdb' with /dev/md, /dev/drbd, etc.
Create a single LVM partition on /dev/sdb:
fdisk /dev/sdb
In fdisk, enter:
n        # New
p        # Primary
1        # Partition number
1        # Starting block
<enter>  # Automatically choose the last free block
t        # Change the partition type
8e       # Linux LVM
w        # Write out the changes
SAN
"Credit': This is a modified version of the How To here: http://remcobressers.nl/2008/07/running-iscsi-san-centos-5/
First, check if iscsitarget is in your repo. If you are running CentOS, it probably isn't.
yum list | grep iscsitarget
If it is there, install it.
Install IET Daemon From Source
If not, install dependant RPMS, download and install it from sourceforge. Update the following commands with the most current version of IET:
yum -y install kernel-devel openssl-devel gcc rpm-build kernel-xen-devel.x86_64
cd /usr/src
wget http://sourceforge.net/projects/iscsitarget/files/iscsitarget/1.4.18/iscsitarget-1.4.18.tar.gz/download
tar -xvzf iscsitarget-1.4.18.tar.gz
cd iscsitarget-1.4.18
make
make install
NOTE: If you update your kernel, you will need to recompile IET against the new kernel! REMEMBER THIS
Configuring IET
...
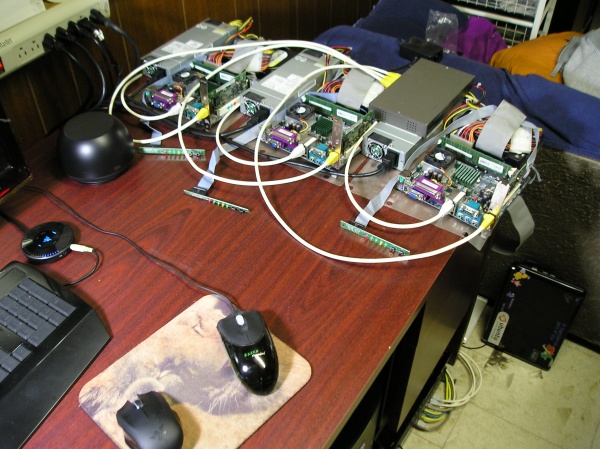
Build Pictures
See, I really am still working on this!

| Any questions, feedback, advice, complaints or meanderings are welcome. | |||
| Alteeve's Niche! | Alteeve Enterprise Support | Community Support | |
| © 2025 Alteeve. Intelligent Availability® is a registered trademark of Alteeve's Niche! Inc. 1997-2025 | |||
| legal stuff: All info is provided "As-Is". Do not use anything here unless you are willing and able to take responsibility for your own actions. | |||