MediaWiki on CentOS/MySQL
|
Alteeve Wiki :: MediaWiki on CentOS/MySQL |
How to install MediaWiki on a CentOS server using MySQL
A few assumptions:
- Your website exists in '/var/www/<FQDN>/' with the four subdirectories:
- html/ (Document Root, aka 'html')
- cgi-bin/ (CGI scripts, aka 'cgi-bin')
- logs/ (log files, aka 'logs')
- temp/ (working directory, aka 'temp')
This also assumes that you've got MySQL set to require a password for the DB owner (by running "mysqladmin -u root password NEWPASSWORD [-pOLDPASSWORD]"). In this doc the owning DB user will be 'apache').
All steps are showing from the command line shell and
Download
Download the latest version from here.
It may be easiest to right->click on the link, go to the terminal, switch into the 'temp' directory and type:
$ wget http://download.wikimedia.org/mediawiki/1.13/mediawiki-1.13.3.tar.gz
Replace the URL with the latest one available from the above link. This is a good time to mention that this How-To was written for MediaWiki 1.13.2 so if your version is different some steps may vary.
To extract, while still in 'temp', simply type:
$ tar -xvzf mediawiki-1.13.3.tar.gz
Last, change the ownership of the extracted files to 'www-data:www-data' (or the user:group of your choice). You will need root access to do this.
# chown www-data:www-data . -R
Install
You will need to create a database, move the files into place and then setup the config file.
Create The DB
As the 'root' user or as the user that will own the database run:
$ mysqladmin create DBNAME
Replace 'DBNAME' with the name of you wiki.
Now create the user and give that user full access to the database.
$ mysql DBNAME -pPASSWORD
mysql> CREATE USER 'USERNAME'@'localhost' IDENTIFIED BY 'USERPASSWORD';
Replace 'DBNAME' with the name of you wiki, 'USERNAME' with the name of the user that you will connect to the wiki database as and finally 'USERPASSWORD' with the password you want to set for this user.
Last, grant the new user full access to the database.
mysql> GRANT ALL ON DBNAME.* TO 'USERNAME'@'localhost';
Likewise, replace 'DBNAME' with the name of your wiki database and 'USERNAME' with the username you create above.
Importing an existing MediaWiki DB
Skip this step if you are creating a new wiki.
Run:
$ mysql -u USERNAME -pUSERPASSWORD DBNAME < /path/to/backup/file.sql
Again, replacing the database, username and userpassword as necessary.
From here on, run the setup as if it were a new wiki install. The installer is smart enough to pick up the existing DB data and use it.
Moving Files
The files were extracted under the 'temp' directory. Now copy them to the 'html' directory. I like to copy rather than move in case I screw up and want to start over. You may need to do this as root or as the user set with proper permissions on the '/var/www/<FQDN>/temp/' directory.
$ cd /var/www/<FQDN>/temp/
$ cp -Rvp temp/mediawiki-1.13.2/* html/
$ cd html/
You should now see the MediaWiki files in the 'html' directory. Double check that they have proper ownership.
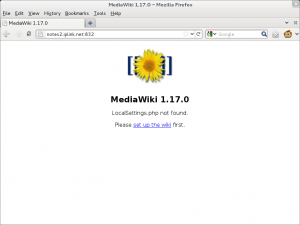
To see if things are working so far, go to your website and you should see:

- The above steps were largely taken from the MediaWiki Install steps.
Configuring MediaWiki
While still looking at the page above, click on the set up the wiki link. You should see a page similar to the one on the right side of this page:
Be sure to switch to 'PostgreSQL' for the database and to set the database name, user name and password as you set earlier. As for which license you use, what you call your wiki and so on is up to you.
If everything went well you should see this after proceeding:
- The above steps were largely taken from the MediaWiki Config steps.
Starting The Wiki
Before you can log into the wiki for the first time, you need to move the configuration file into place. Go back to your 'html' directory, copy 'config/LocalSettings.php' to the 'html' directory and change it's permissions to prevent global read access as your passwords are in it. Double check that the webserver user has read access to the LocalSettings.php file.
$ cd /var/www/<FQDN>/html/
$ cp -p config/LocalSettings.php .
$ chown www-data:www-data LocalSettings.php
$ chmod 770 LocalSettings.php
Now go back to the post configuration page and follow the this link link at the bottom of the page.
That's it!
You should now be looking at your shiny new wiki! Be sure to login for the first time using the name and password you set above.
Further Config
Here are steps for various methods of further configuring your wiki.
Restrict Edit to Registered Users Only
To setup your wiki to allow only logged in users edit access:
To be written.
| Any questions, feedback, advice, complaints or meanderings are welcome. | |||
| Alteeve's Niche! | Alteeve Enterprise Support | Community Support | |
| © 2025 Alteeve. Intelligent Availability® is a registered trademark of Alteeve's Niche! Inc. 1997-2025 | |||
| legal stuff: All info is provided "As-Is". Do not use anything here unless you are willing and able to take responsibility for your own actions. | |||