Anvil! m2 Tutorial: Difference between revisions
| Line 705: | Line 705: | ||
Backing up some network related system files. | Backing up some network related system files. | ||
- Backing up: [/etc/udev/rules.d/70-persistent-net.rules] | - Backing up: [/etc/udev/rules.d/70-persistent-net.rules] | ||
- | - Previous backup exists, skipping. | ||
- Backing up: [/etc/sysconfig/network-scripts] | - Backing up: [/etc/sysconfig/network-scripts] | ||
- | - Previous backup exists, skipping. | ||
Done. | Done. | ||
Checking if we need to freeze NetworkManager on the active interface. | |||
- NetworkManager is running, will examine interfaces. | |||
- Freezing interfaces: eth0 | |||
- Note: Other interfaces may go down temporarily. | |||
Done | |||
Making sure all network interfaces are up. | Making sure all network interfaces are up. | ||
- The network interface: [eth1] is down. It must be started for the next stage. | |||
- Checking if: [/etc/sysconfig/network-scripts/ifcfg-eth1] exists. | |||
- Config file exists, changing BOOTPROTO to 'none'. | |||
- Attempting to bring up: [eth1]... | |||
- Checking to see if it is up now. | |||
- The interface: [eth1] is now up! | |||
- The network interface: [eth2] is down. It must be started for the next stage. | |||
- Checking if: [/etc/sysconfig/network-scripts/ifcfg-eth2] exists. | |||
- Config file exists, changing BOOTPROTO to 'none'. | |||
- Attempting to bring up: [eth2]... | |||
- Checking to see if it is up now. | |||
- The interface: [eth2] is now up! | |||
- The network interface: [eth3] is down. It must be started for the next stage. | |||
- Checking if: [/etc/sysconfig/network-scripts/ifcfg-eth3] exists. | |||
- Config file exists, changing BOOTPROTO to 'none'. | |||
- Attempting to bring up: [eth3]... | |||
- Checking to see if it is up now. | |||
- The interface: [eth3] is now up! | |||
Done. | Done. | ||
Revision as of 08:24, 30 December 2014
| Warning: This tutorial is NOT complete! It is being written using Striker version 1.2.0 β. Things may change between now and final release. |
I hear you now; "Oh no, another book!"
Well don't despair. If this tutorial is a "book", it's a picture book.
You should be able to finish the entire build in a day or so.
If you're familiar with RHEL/Linux, then you might well be able to finish by lunch!
What is an 'Anvil!', Anyway?
Simply put;
- The Anvil! is a high-availability cluster platform for hosting virtual machines.
Slightly less simply put;
- The Anvil! is;
- Exceptionally easy to build and operate.
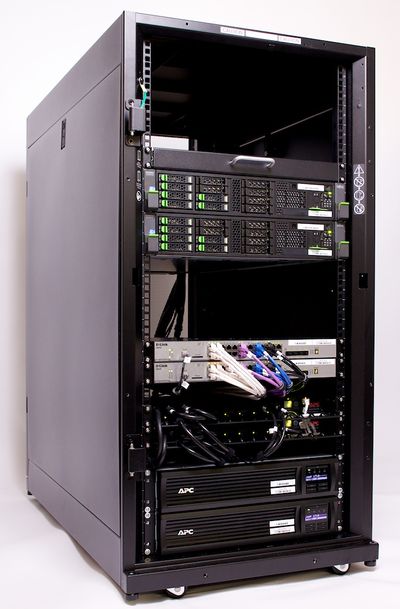
- A pair of "nodes" that work as one to host one or more highly-available (virtual) servers in a manner transparent to the servers.
- Hosted servers can live-migrate between nodes, allowing business-hours maintenance of all systems without downtime.
- Existing expertise and work-flow are almost 100% maintained requiring almost no training for staff and users.
- A "Foundation Pack" of fault-tolerant network switches, switched PDUs and UPSes. Each Foundation pack can support one or more "Compute Pack" node pairs.
- A pair of "Striker" dashboard management and support systems which provide very simple, web-based management on the Anvil! and it's hosted servers.
- A "Scan Core" monitoring and alert system tightly couple to all software and hardware systems that provides fault detection, predictive failure analysis, and environmental monitoring with an early-warning system.
- Optionally, "Scan Core" can automatically, gracefully shut down an Anvil! and it's hosted servers in low-battery and over-temperature events as well as automatically recovery when safe to do so.
- Optional commercial supported with 24x7x365 monitoring, installation, management and customization services.
- 100% open source (GPL v2+ license) with HA systems built to be compliant with Red Hat support.
- No vendor lock-in.
- Entirely COTS equipment, entirely open platform. You are always free to shift vendors at any time.
Pretty darn impressive, really.
What This Tutorial Is
This is meant to be a quick to follow project.
It assumes no prior experience with Linux, High Availability clustering or virtual servers. It does require a basic understanding of things like networking, but as few assumptions as possible are made about prior knowledge.
What This Tutorial Is Not
Unlike the main tutorial, this tutorial is not meant to give the reader an in-depth understanding of High Availability concepts.
Likewise, it will not go into depth on why the Anvil! is designed the way it is.
It will not go into a discussion of how and why you should choose hardware for this project, either.
All this said, this tutorial will try to provide links to the appropriate sections in the main tutorial as needed. So if there is a point where you feel lost, please take a break and follow those thinks.
What is Needed?
| Note: We are an unabashed Fujitsu, Brocade and APC reseller. No vendor is perfect, of course, but we've selected these companies for their high quality build standards and excellent post-sales support. You are, of course, perfectly able to substitute in any hardware you like, just so long as it meets the system requirements listed. |
Some system requirements;
(All equipment must support RHEL version 6)
A machine for Striker
A server? An appliance!
The Striker dashboard runs like your home router; It has a web-interface that allows you to create, manage and access new highly-available servers, manage nodes and monitor foundation pack hardware.
 |
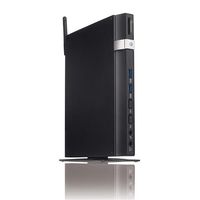 |
The Striker dashboard has very low performance requirements. If you build two dashboards, then no redundancy in the dashboard itself is required as each will provide backup for the other.
We have used;
- Very light-weight machines like the ASUS EeeBox with a simple Apple USB ethernet adapter.
- On the other end of the scale, we've used fully redundant Fujitsu Primergy RX 1330 M1 servers with four network interfaces. The decision here will be principally guided by your budget.
If you use a pair on non-redundant "appliance" machines, be sure to stager each of them across the two power power rails and network switches.
A Pair of Anvil! Nodes
The more fault-tolerant, the better!
The Anvil! Nodes host power your highly-available servers, but the servers themselves are totally decoupled from the hardware. You can move your servers back and forth between these nodes without any interruption. In a node explodes without warning, the survivor will reboot your servers within seconds ensuring the most minimal service interruptions (typical recovery time from node crash to server being at the login prompt is 30 to 90 seconds).
 |
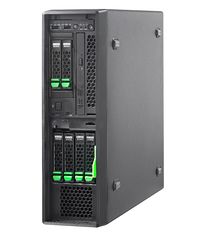 |
The requirements are two servers with the following;
- A CPU with hardware-accelerated virtualization
- Redundant power supplies
- IPMI or vendor-specific out-of-band management, like Fujitsu's iRMC, HP's iLO, Dell's iDRAC, etc
- Six network interfaces, 1 Gbit or faster (yes, six!)
- 4 GiB of RAM and 44.5 GiB of storage for the host operating system, plus sufficient RAM and storage for your servers
Beyond these requirements, the rest is up to you; your performance requirements, your budget and your desire for as much fault-tolerance as possible.
| Note: If you have a bit of time, you should really read the section discussing hardware considerations from the main tutorial before purchasing hardware for this project. It is very much not a case of "buy the most expensive and you're good". |
Foundation Pack
The foundation pack is the bedrock that the Anvil! node pairs sit on top of.
The foundation pack provides two independent power "rails" and each Anvil! node has two power supplies. When you plug in each node across the two rails, you get full fault tolerance.
If you have redundant power supplies on your switches and/or Striker dashboards, they can span the rails too. If they have only one power supply, then you're still OK. You plug the first switch and dashboard into the first power rail, the second switch and dashboard into the second rail and you're covered! Of course, be sure you plug the first dashboard's network connections into the same switch!
| UPSes | |
|---|---|
 |
 |
| Switched PDUs | |
 |
 |
| Network Switches | |
 |
 |
It is easy, and actually critical, that the hardware you select be fault-tolerant. The trickiest part is ensuring your switches can fail back and forth without interrupting traffic, a concept called "hitless fail-over". The power is, by comparison, much easier to deal with.
You will need;
- Two UPSes (Uninterruptable Power Supplies) with enough battery capacity to run your entire Anvil! for your minimum no-power hold up time.
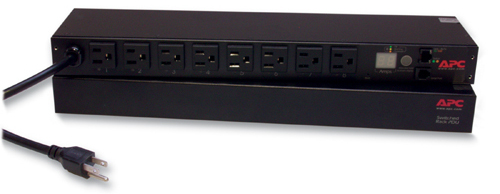
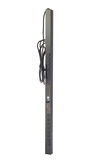
- Two switched PDUs (Power Distribution Units) (basically network-controller power bars)
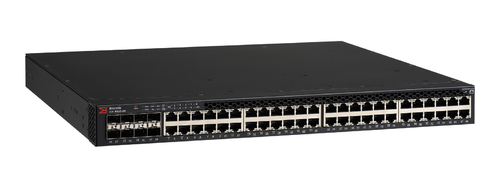
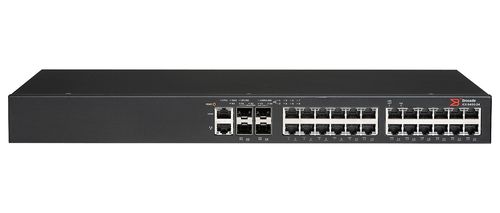
- Two network switches with hitless fail-over support, if stacked. Redundant power supplies are recommended.
What is the Build Process?
The core of the Anvil!'s support and management is the Striker dashboard. It will become the platform off of which nodes and other dashboards are built from.
So the build process consists of:
Setup the First Striker Dashboard
If you're not familiar with installing Linux, please don't worry. It is quite easy and we'll walk through each step carefully.
We will:
- Do a minimal install off of a standard RHEL 6 install disk.
- Grab the Striker install script and run it.
- Load up the Striker Web Interface.
That's it, we're web-based from there on.
Preparing the Anvil! Nodes
It's rather difficult to borderline-impossible to fully automate the node install process, but Striker does automate the vast majority of it.
It simplifies the few manual parts by automatically becoming a simple menu-driven target for operating system installs.
The main goal of this stage is to get an operating system onto the nodes so that the web-based installer can take over.
- Boot off the network
- Select the "Anvil! Node" install option
- Select the network card to install from, wait for the install to finish
- Find and note the node's IP address.
- Repeat for the second node.
We can proceed from here using the web interface.
Configure the Foundation Pack Backup Fencing
| Note: Every vendor has their own way of configuring their hardware. We we describe the setup for the APC-brand switched PDUs. |
We need to ensure that the switched PDUs are ready for use as fence devices before we configure an Anvil!.
Thankfully, this is pretty easy.
Create an "Install Manifest"
An "Install Manifest" is a simple file you can create using Striker.
You just enter a few things like the name and sequence number of the new Anvil! and the password to use. It will recommend all the other settings needed, which you can tweak if you want.
Once the manifest is created, you can load it, specify the new nodes' IP addresses and let it run. When it finishes, your Anvil! will be ready!
Adding Your New Anvil! to Striker
The last step will be to add your shiny new Anvil! to your Striker system.
Basic Use of Striker
It's all well and good that you have an Anvil!, but it doesn't mean much unless you can use it. So we will finish this tutorial by covering a few basic tasks;
- Create a new server
- Migrate a server between nodes.
- Modify an existing server
We'll also cover the nodes;
- Powering nodes off and on (for upgrades, repairs or maintenance)
- Cold-stop your Anvil! (before an extended power outage, as an example)
- Cold-start your Anvil! (after power is restored, continuing the example)
The full Striker instructions can be found on the Striker page.
Building a Striker Dashboard
We recommend Red Hat Enterprise Linux (RHEL), but you can also use the free, binary-compatible rebuild called CentOS. Collectively these (and other RHEL-based operating systems) are often call "EL" (for "Enterprise Linux"). We will be using release version 6, which is shorted to simple EL6.
Downloading The Install DVD
If you wish to use RHEL6, you will need to purchase for each node:
- Red Hat Enterprise Linux 6 (appropriate for you hardware/sockets)
- Resilient Storage Add-On (which includes the High-Availability Add-On)
You can get a 30-day trial of RHEL 6 if you would like to try the Anvil! with RHEL proper before you purchase.
If you want to use CentOS, you can download the install disk here:
- Direct link (University of Waterloo mirror) for 6.6;
- Minimal DVD (383 MB)
- Full DVD 1 (4.3 GB) (we don't need disk 2)
- Bit Torrent;
- To use a direct link closer to you, please find the mirror closest to you;
Once you have downloaded the ISO image, use your favourite DVD burning program to write it to a disk. Insert it into your computer (or plug in a USB DVD drive) and boot off of it.
Operating System Install
| Note: This section of the tutorial assumes you are using the full install DVD. If you downloaded the Minimal disk, don't worry. The only real difference is that the "Install Type" will be skipped. |
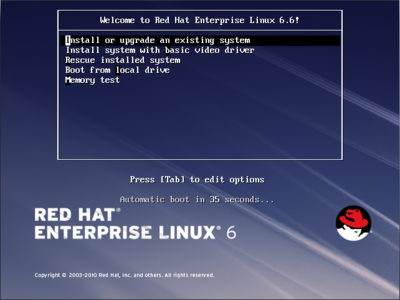
When you first boot, you will see the initial boot menu. Choose;
- Install or upgrade an existing system
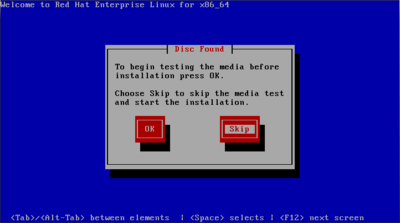
You will be asked if you want to check the DVD disc to make sure there are no scratches or other problems that might cause a failure during an install. If you're using a new disk, you can safely skip this. If you want to be extra careful, you are certainly free to run it by pressing 'OK'. I know my copy is good, so I will 'Skip' it.
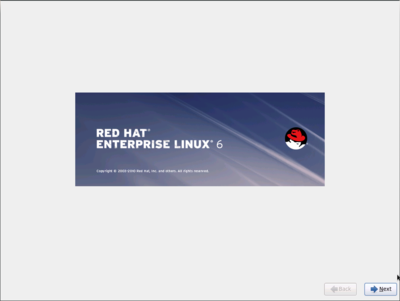
The install will switch to a graphical install at this point. The only thing to do is press the 'Next' button in the bottom-right.
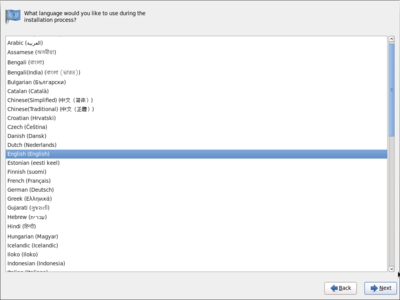
You can choose your preferred language. We'll choose English.
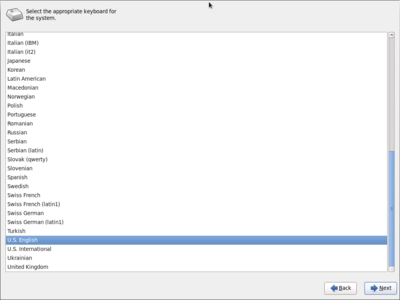
Then you can choose your keyboard type. We'll choose U.S. English.
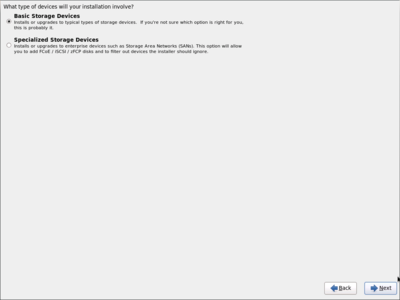
Now we see a little more complex question, but don't worry. We're always going to choose the first option;
- Basic Storage Device
The second option is only needed by people connecting external, networked storage (called iSCSI).
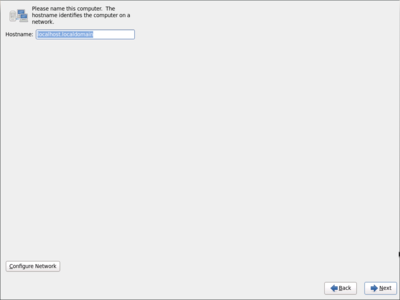
We can give the server a name (and configure the network) here if we wanted to. However, the Striker installer will handle all of this in a little bit, so we'll leave everything as default and simply click 'Next'.
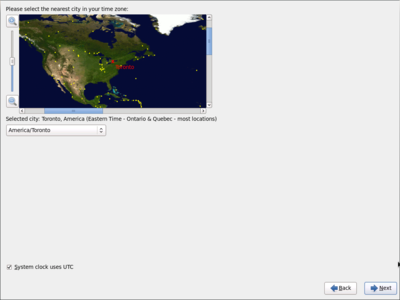
| Note: It is not required, but it is recommend that the "system clock uses UTC" check-box is selected. |
Click on the map in the top-right corner to find your time zone. Alternatively, click the select box below Selected City to find your time zone by name.
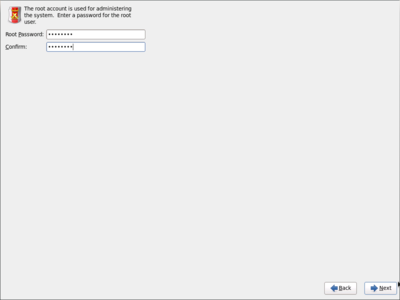
| Warning: Please don't forget the password you enter here! |
The Striker installer will update the system (root user) password, but we need to enter something to use during the install. It is fine to use the same password you plan to use later, of course.
For the sake of the tutorial, we will use 'Initial1'.
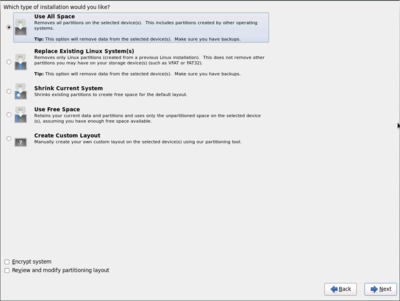
This is a dedicated machine, so we're going to use all of the disk.
- Click the top radio-button to select "Use All Space".
- Click on 'Next'
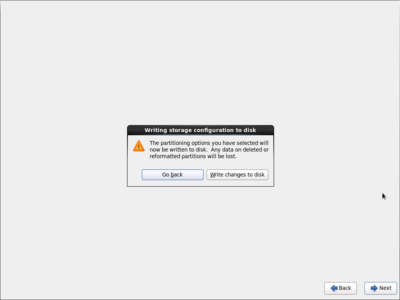
The partitioning step will erase anything that might have been on your computer, so the installer asks you to confirm. Do so by clicking on Write changes to disk'.
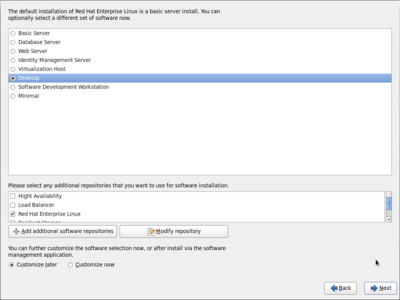
For the sake of keeping this install as simple as possible, we're going to select the "Desktop" radio button. The check-boxes below can be left as they are.
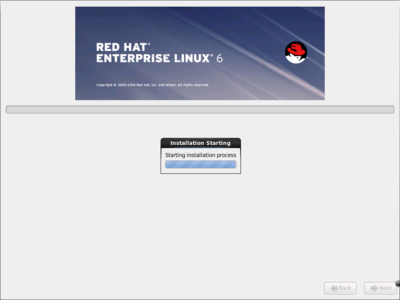
Voila! The installation is under way.
Now is a great time to go grab a $drink.
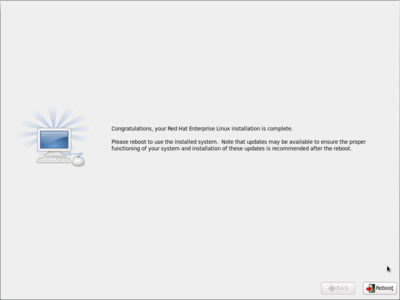
After a little while, the install will be finished. All that is left to do is click on 'Reboot'!
Striker First Boot
| Note: If you are using CentOS, the screens asking to register with Red Hat's Network will not apply to you and you can safely ignore them. |
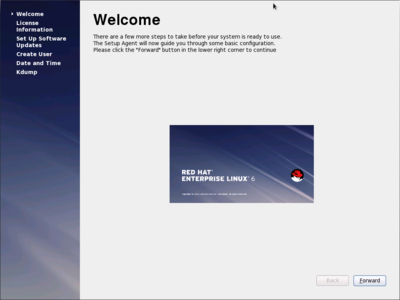
The first time that RHEL runs, it will ask you a few questions. Being polite though, it starts of welcoming you. Press 'Forward' to get started.
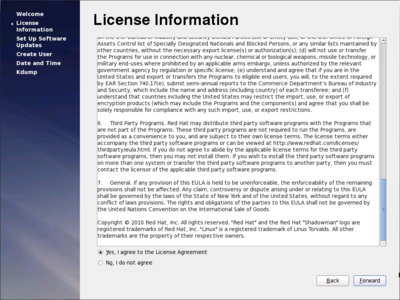
| Note: On CentOS, this license is quite a bit simpler. |
Being that RHEL is a commercial operating system, there is an End User License Agreement. It is a refreshingly short document, explaining the GNU licensing, limitations of warranty, export restrictions and so on. Please read it over and then, if you agree, press 'Forward' to agree.
| Note: On CentOS, this stage (and the windows that follow) do not apply to you. |
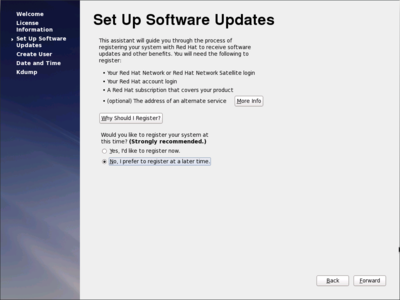
When you purchased your Red Hat support (via the RHEL6 purchase), or when you registered for your 30-day trial, you will have created a Red Hat Network (RHN) account. If you want to use those credentials to register your system now, you can do so.
For the sake of brevity, we're going to skip registration just now and come back to it after the install is done.
Click to select the "No, I prefer to register at a later time." radio button and the press 'Forward'.
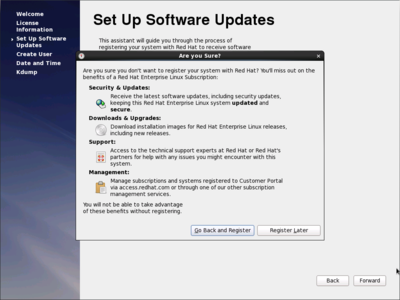
You will be asked to confirm that you want to skip registration. Click 'Register Later' to confirm.
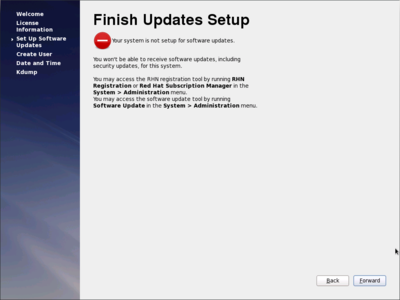
A little flair for the dramatic.
We're reminded that we won't get updated at this time, but that is OK, we'll register later. For now, click 'Forward'.
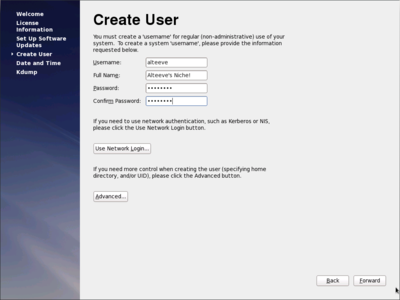
This is where you create your normal user. You can use any name you like. We're using;
- Username: alteeve
- Full Name: Alteeve's Niche!
Enter the password you want to use for this user. Note that it will not be altered later by the Striker installer.
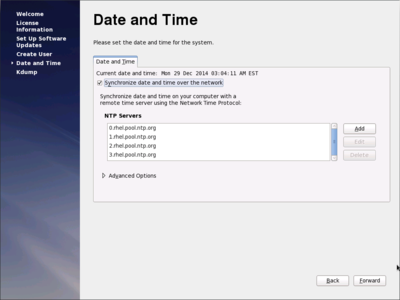
Next we tell the system to keep it's date and time in sync with time servers on the Internet.
To do this, click to select 'Synchronize date and time over the network. The default pool of time servers are fine.
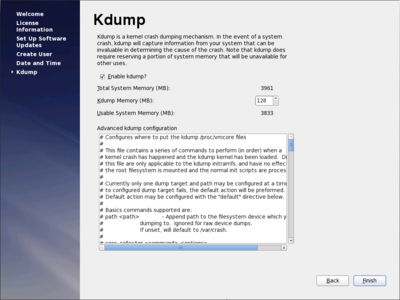
The 'kdump' service can be quite useful if you run into trouble down the road, so we're doing to leave it enabled.
Click 'Finish'.
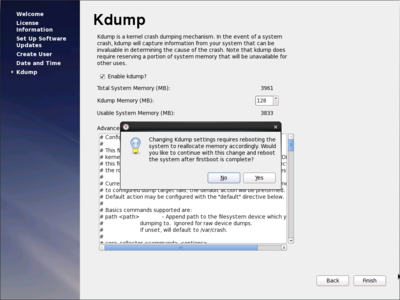
The 'kdump' service needs a reboot to start working, so it prompts you to reboot when the setup finishes. Click on 'Yes' and then 'OK'.
Your system will reboot and we're done!
Enabling Network Access
| Note: This section may not be needed on your install. |
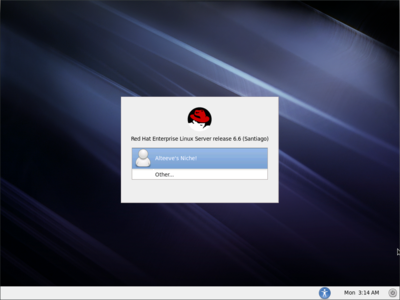
When the system boots, it will wait at the login prompt. Click on your name to get the password prompt.
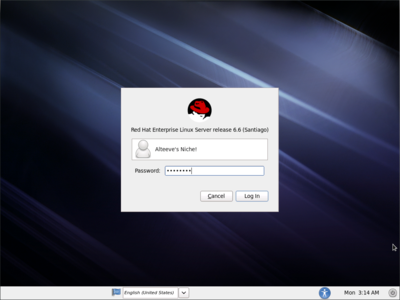
Enter your password and then click on 'Log In'.
| Note: With luck, the next section will not apply to you and you can skip it. |
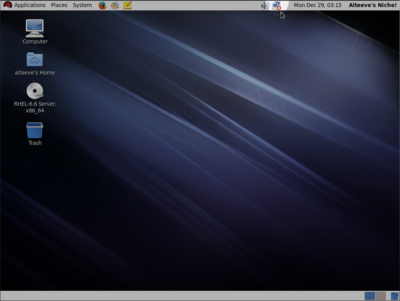
In some cases, RHEL6 doesn't start the network at first. Thankfully, the fix is very easy.
Click on the 'Network' icon which is highlighted in the screen shot above.
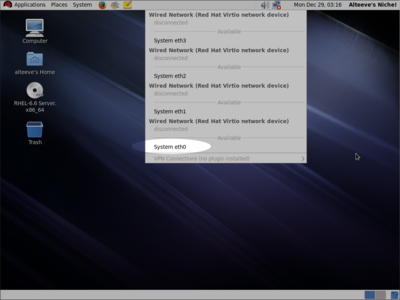
Our system has found network cards, but only one was configured and it wasn't started.
We can see that the configured one is 'System eth0' (the others show disconnected under them).
To start the network, all you need to do is click on 'System eth0'.
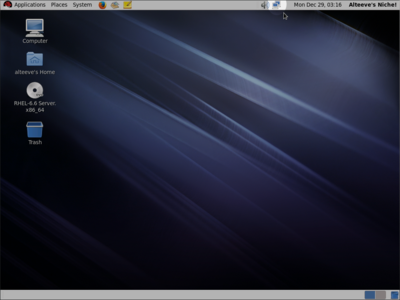
The network icon will spin for a moment and then it will show that it is connected.
Download the Striker Installer
The Striker installer is a small "command line" program that you download and run. It looks a little intimidating at first, but it's actually quite easy to use.
We need to download it from the Internet. You can download it in your browser by clicking here, if you like.
We're going to have to use the command line though, so for this tutorial, we will download it that way.
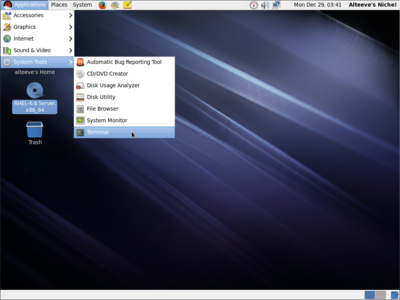
To open the terminal, on the top-left corner click on 'Applications' -> 'System Tools' -> 'Terminal'.
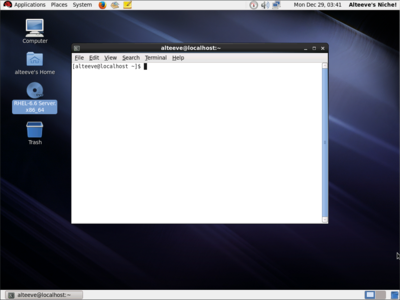
This is where we're going to do the rest of our work. So instead of screen shots, we'll show you the commands you need to write.
By default, the terminal window runs as the normal user you created ('alteeve' in our case). To run the installer, we need to switch to the administrative user called the 'root' user. To do this, type:
su -
You will be prompted to enter the root user password. This was the first password you entered during the operating system install above.
| Note: There is no feedback when you type the password, this is normal. |
Password:
If you got the password right, the command prompt will change to:
[root@localhost ~]#
Excellent, now we can download the installer!
To do that, run this command:
wget -c https://raw.githubusercontent.com/digimer/striker/master/tools/striker-installer
--2014-12-29 17:10:48--  https://raw.githubusercontent.com/digimer/striker/master/tools/striker-installer
Resolving raw.githubusercontent.com... 23.235.44.133
Connecting to raw.githubusercontent.com|23.235.44.133|:443... connected.
HTTP request sent, awaiting response... 200 OK
Length: 154973 (151K) [text/plain]
Saving to: “striker-installer”

100%[======================================>] 154,973      442K/s   in 0.3s

2014-12-29 17:10:48 (442 KB/s) - “striker-installer” saved [154973/154973]
One last step!
To tell Linux that a file is actually a program, we have to set it's "mode" to be "executable". To do this, run this command:
chmod a+x striker-installer
There is no output from that command, so lets verify that it worked with the 'ls' too.
ls -lah striker-installer
-rwxr-xr-x. 1 root root 152K Dec 29 17:10 striker-installer
See the '-rwxr-xr-x.' line? That tells use that the file is not 'executable'.
We're ready!
Knowing What we Want
When we run the Striker installer, we're going to tell it how to configure itself. So to do this, we need to make a few decisions.
What company or organization name to use?
When a user logs into Striker, they are asked for a user name and password. The box that pops up has a company (or organization) name to help tell the user what they are connecting to.
This can be whatever makes sense to you. For this tutorial, we'll use 'Alteeve's Niche!'.
What do we want to call this Striker dashboard?
To help identify this machine on the network and to differentiate it from the other dashboards you might build, we'll want to give it a name. This name has to be similar to a domain name you would see on the Internet, but beyond that it can be whatever you want.
Generally, this name is made up of a two or three letter "prefix" that describes who owns it. Our name is "Alteeve's Niche!", we we use the prefix 'an-'. Following this is a description of the machine followed by our domain name.
This is our first Striker dashboard and our domain name is 'alteeve.ca', so we're going to use the name 'an-striker01.alteeve.ca'.
How can we send email?
The Anvil! nodes will send out an email alert should anything of note happen. In order to do this though, it needs to know what mail server to use and what email address and password to use when authenticating.
You will need to get this information from whomever provides you with email services.
In our case, our mail server is at the address 'mail.alteeve.ca' listening for connections on TCP port '587'. We're going to use the email account 'example@alteeve.ca' which has the password 'Initial1'.
When user name and password to use?
There is no default user account or default password on Striker dashboards.
Both the user name and password are up to you to choose. Most people use the user name 'admin', but this is by convention only.
For this tutorial, we're going to use the user name 'admin' and the password 'Initial1'.
What IP addresses to use
| Note: This section requires a basic understanding of how networks work. If you want a bit more information on networking in the Anvil!, please see the "Subnets" section of the main tutorial. |
The Striker dashboard will connect to two networks;
- Internet-Facing Network (The IFN); Your existing network, usually connected to the Internet.
- Back-Channel Network (The BCN); The dedicated network used by the Anvil!
The IP address we use on the IFN will depend on your current network. Most networks use 192.168.1.0/24, 10.255.0.0/16 or similar. In order to access the Internet, we're going to need to specify the default gateway and a couple DNS servers to use.
For this tutorial, we'll be using the IP address '10.255.4.1/16', the default gateway is '10.255.255.254' and we'll use Google's open DNS servers at the IP addresses '8.8.8.8' and '8.8.4.4'.
The IP address we use on the BCN is almost always on the '10.20.0.0/16' network. For this tutorial, we'll be using the IP address '10.20.4.1/16'.
Do we want to be an Anvil! node install target?
One of the really nice features of Striker dashboards is that you can use them to automatically install the base operating system on new and replacement Anvil! nodes.
To do this, Striker can be told to setup a "PXE" (P're-eCecution Environment) server. When this is enabled, you can tell a new node to "boot off the network". Doing this allows you to boot and install an operating system without using a boot disc. Also, it allows us to specify special install instruction, removing the need to ask you how you want to configure the OS.
The Striker dashboard will do everything for you to be an install target.
When it's done, it will offer up IP addresses on the BCN network (to avoid conflicting with any existing DHCP servers you might have). It will configure RHEL and/or CentOS install targets and all the ancillary steps needed to make all this work.
We will need to tell it a few things though;
- What range of IPs should it offer to new nodes being installed?
- Do we want to offer RHEL as a target? If so, where do we find the install media?
- Do we want to offer CentOS as a target? If so, where do we find the install media?
| Note: If you are using CentOS, switch to setup CentOS and skip RHEL. |
For this tutorial, we're going to use the choose;
- A network range of '10.20.10.200' to '10.20.10.210'
- Setup as a RHEL install target using the disc in the DVD drive
- Skip being a CentOS install target.
Do we need to register with RHN?
If you are using CentOS, the answer is "No".
If you are using RHEL, and if you skipped registration during the OS install like we did above, you will need to register now. We skipped it at the time to avoid the network hassle some people run into.
To save an extra step of manually registering, we can tell the Striker installer that we want to register and what our RHN credentials are. This will be the user name and password Red Hat gave you when you signed up for the trial or when you bought your Red Hat support.
We're going to do that here. For the sake of documentation, we'll use the pretend credentials 'user' and the password 'password'.
Mapping network connections
In the same way that every car has a unique VIN, so does every network card. Each network port has it's own MAC address.
There is no inherent way for the Striker installer to know which network port plugs into what network. So the first step of the installer needs to ask you to unplug and then plug in each network card when prompted.
If you want to know more about how networks are used in the Anvil!, please see:
- "Planning The Use of Physical Interfaces" over on the main tutorial
If your Striker dashboard has just two network interfaces, then the first will ask you which interface plugs into your Back-Channel Network and then which one plugs into your Internet-Facing Network.
If your Striker dashboard has four network interfaces, then two will be paired up for the BCN and two will be paired up for the IFN. This will allow you to span each pair across the two switches for redundancy.
The Striker installer is smart enough to sort this all out for you. You just need to unplug the right cables when prompter.
Running the Striker Installer
Excellent, now we're ready!
When we run the striker-installer program, we will tell Striker of our decisions using "command line switches". These take the form of:
- -x value
- --foo value
If the 'value' has a space in it, then we'll put quotes around it.
If you want to know more about the switches, you can run './striker-installer' by itself and all the available switches and how to use them will be explained. This tutorial isn't meant to be comprehensive though, so we're not going to go into all the ways we can use the installer.
| Note: This uses the 'git' repository option. It will be redone later without this option once version 1.2.0 is released. Please do not use 'git' versions in production! |
Here is how we take our decisions above and turn them into a command line call:
| Purpose | Switch | Value | Note |
|---|---|---|---|
| Company name | -c | "Alteeve's Niche\!" | At the command line, the ! has a special meaning. By using '\!' we're telling the system to treat it literally. |
| Host name | -n | an-striker01.alteeve.ca | The network name of the Striker dashboard. |
| Mail server | -m | mail.alteeve.ca:587 | The name and port number of the mail server do we go to send email to. |
| Email user | -e | "example@alteeve.ca:Initial1" | In this case, the password doesn't have a space, so quotes aren't needed. We're using them to show what it would look like if you did need it. |
| Striker user | -u | "admin:Initial1" | As with the email user, we don't need quotes here because our password doesn't have a space in it. It's harmless to use quotes though, so we use them. |
| IFN IP address | -i | 10.255.4.1/16,dg=10.255.255.254,dns1=8.8.8.8,dns2=8.8.4.4 | Sets the IP address, default gateway and DNS servers to use on the Internet-Facing Network. |
| BCN IP address | -b | 10.20.4.1/16 | Sets the IP address of the Back-Channel Network. |
| Boot IP Range | -p | 10.20.10.200:10.20.10.210 | The range of IP addresses we will offer to nodes using this Striker dashboard to install their operating system. |
| RHEL Install Media | --rhel-iso | dvd | Tell Striker to setup RHEL as an install target and to use the files on the disc in the DVD drive. |
| RHN Credentials | --rhn | "user:secret" | The Red Hat Network user and password needed to register this machine with Red Hat. |
| Note: In Linux, you and put a ' \' to spread one command over multiple lines. We're doing it this way to make it easier to read only. You can type the whole command on one line. |
Putting it all together, this is what our command will look like:
./striker-installer \
 -c "Alteeve's Niche\!" \
 -n an-striker01.alteeve.ca \
 -m mail.alteeve.ca:587 \
 -e "example@alteeve.ca:Initial1" \
 -u "admin:Initial1" \
 -i 10.255.4.1/16,dg=10.255.255.254,dns1=8.8.8.8,dns2=8.8.4.4 \
 -b 10.20.4.1/16 \
 -p 10.20.10.200:10.20.10.210 \
 --rhel-iso dvd \
 --rhn "user:secret"
That was the hardest part, and it wasn't really hard, was it?
When you press <enter>, the install will start.
Let's Go!
Here is what the install should look like:
 ##############################################################################
 #   ___ _       _ _                                    The Anvil! Dashboard  #
 #  / __| |_ _ _(_) |_____ _ _                                 -=] Installer  #
 #  \__ \  _| '_| | / / -_) '_|                                               #
 #  |___/\__|_| |_|_\_\___|_|                                                 #
 #                                               https://alteeve.ca/w/Striker #
 ##############################################################################

[ Note ] - Will install the latest version from git.

 ##############################################################################
 # [ Warning ] - Please do NOT use a git version in production!               #
 ##############################################################################

Sanity checks complete.

Checking the operating system to ensure it is compatible.
- We're on a RHEL (based) OS, good. Checking version.
- Looks good! You're on: [6.6]
- This OS is RHEL proper.
- RHN credentials given. Attempting to register now.
- [ Note ] Please be patient, this might take a minute...
- Registration was successful.
- Adding 'Optional' channel...
- 'Optional' channel added successfully.
Done.

Backing up some network related system files.
- Backing up: [/etc/udev/rules.d/70-persistent-net.rules]
- Previous backup exists, skipping.
- Backing up: [/etc/sysconfig/network-scripts]
- Previous backup exists, skipping.
Done.

Checking if we need to freeze NetworkManager on the active interface.
- NetworkManager is running, will examine interfaces.
- Freezing interfaces: eth0
- Note: Other interfaces may go down temporarily.
Done

Making sure all network interfaces are up.
- The network interface: [eth1] is down. It must be started for the next stage.
- Checking if: [/etc/sysconfig/network-scripts/ifcfg-eth1] exists.
- Config file exists, changing BOOTPROTO to 'none'.
- Attempting to bring up: [eth1]...
- Checking to see if it is up now.
- The interface: [eth1] is now up!
- The network interface: [eth2] is down. It must be started for the next stage.
- Checking if: [/etc/sysconfig/network-scripts/ifcfg-eth2] exists.
- Config file exists, changing BOOTPROTO to 'none'.
- Attempting to bring up: [eth2]...
- Checking to see if it is up now.
- The interface: [eth2] is now up!
- The network interface: [eth3] is down. It must be started for the next stage.
- Checking if: [/etc/sysconfig/network-scripts/ifcfg-eth3] exists.
- Config file exists, changing BOOTPROTO to 'none'.
- Attempting to bring up: [eth3]...
- Checking to see if it is up now.
- The interface: [eth3] is now up!
Done.

-=] Configuring network to enable access to Anvil! systems.
This is where you now need to unplug each network cable, wait a few seconds and then plug it back in.
Beginning NIC identification...
- Please unplug the interface you want to make:
  [Back-Channel Network, Link 1]
When you unplug the cable, you will see:
- NIC with MAC: [52:54:00:00:7a:51] will become: [bcn-link1]
  (it is currently: [eth0])
- Please plug in all network cables to proceed.
When you plug it back in, it will move on to the next interface. Repeat this for your other (or three other) network interfaces.
- Please unplug the interface you want to make:
  [Back-Channel Network, Link 2]
- NIC with MAC: [52:54:00:a1:77:b7] will become: [bcn-link2]
  (it is currently: [eth1])
- Please plug in all network cables to proceed.
- Please unplug the interface you want to make:
  [Internet-Facing Network, Link 1]
- NIC with MAC: [52:54:00:00:7a:50] will become: [ifn-link1]
  (it is currently: [eth2])
- Please plug in all network cables to proceed.
- Please unplug the interface you want to make:
  [Internet-Facing Network, Link 2]
- NIC with MAC: [52:54:00:a1:77:b8] will become: [ifn-link2]
  (it is currently: [eth3])
- Please plug in all network cables to proceed.
A summary will be shown:
Here is what you selected:
- Interface: [52:54:00:00:7A:51], currently named: [eth0],
  will be renamed to: [bcn-link1]
- Interface: [52:54:00:A1:77:B7], currently named: [eth1],
  will be renamed to: [bcn-link2]
- Interface: [52:54:00:00:7A:50], currently named: [eth2],
  will be renamed to: [ifn-link1]
- Interface: [52:54:00:A1:77:B8], currently named: [eth3],
  will be renamed to: [ifn-link2]

The Back-Channel Network interface will be set to:
- IP:      [10.20.4.1]
- Netmask: [255.255.0.0]

The Internet-Facing Network interface will be set to:
- IP:      [10.255.4.1]
- Netmask: [255.255.0.0]
- Gateway: [10.255.255.254]
- DNS1:    [8.8.8.8]
- DNS2:    [8.8.4.4]

Shall I proceed? [Y/n]
| Note: If you are not happy with this, press 'n' and the network mapping part will start over. If you want to change the command line switches, press 'ctrl' + 'c' to cancel the install entirely. |
If you are happy with the install plan, press '<enter>'.
- Thank you, I will start to work now.
There is no other intervention needed now. The rest of the install will complete automatically, but it might take some time.
Now is a good time to go have a $drink.
| "Final Jeopardy" theme is © 2014 Sony Corporation of America |
- Ding*
Striker is done!
| Any questions, feedback, advice, complaints or meanderings are welcome. | |||
| Alteeve's Niche! | Enterprise Support: Alteeve Support |
Community Support | |
| © Alteeve's Niche! Inc. 1997-2024 | Anvil! "Intelligent Availability®" Platform | ||
| legal stuff: All info is provided "As-Is". Do not use anything here unless you are willing and able to take responsibility for your own actions. | |||

