Configuring Hardware RAID Arrays on Fujitsu Primergy
|
Alteeve Wiki :: How To :: Configuring Hardware RAID Arrays on Fujitsu Primergy |
This mini-tutorial is meant to walk you through the process of configuring hardware RAID arrays on Fujitsu Primergy servers using LSI-based controllers.
This is not designed to be an extensive tutorial.
It is meant to be a "quick-start" guide to help you get under way with building an Anvil!. It is part of the "Anvil! m2 Tutorial".
This covers two LSI types;
- MegaRAID Configuration Utility
- WebBIOS
The former is used on the Mx generations and the later from the Sx generation servers.
MegaRAID Configuration Utility
Building a RAID Array
Booting in the MegaRAID Configuration Utility
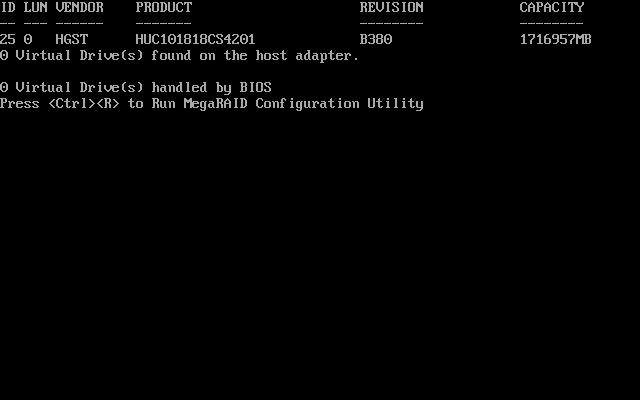
After the main system BIOS is done booting, you will see the hardware RAID controller BIOS start up.
It can take a minute, and this is normal.
Once started, the controller will scan for attached drives and then present an option to press 'ctrl + R' to enter the "MegaRAID Configuration Utility". Do so.
Building an Array
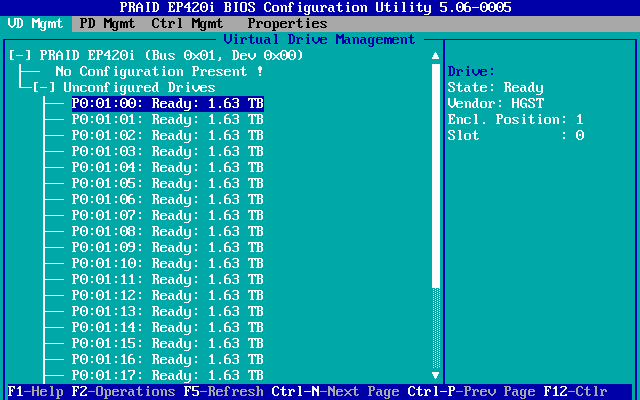
Here we see a controller with 24 1.63 TiB (1.8 TB) disks.
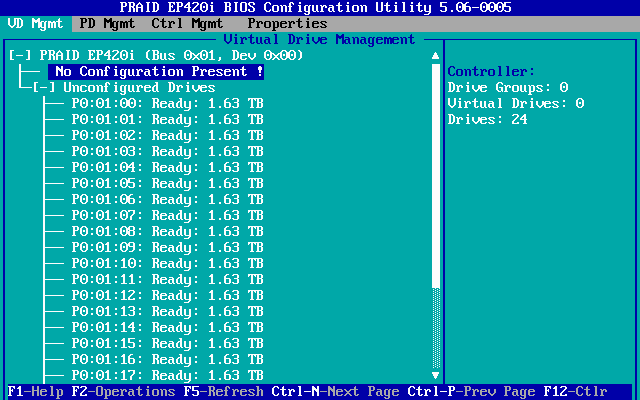
Press the ↑ (up) arrow to highlight No Configuration Present !.
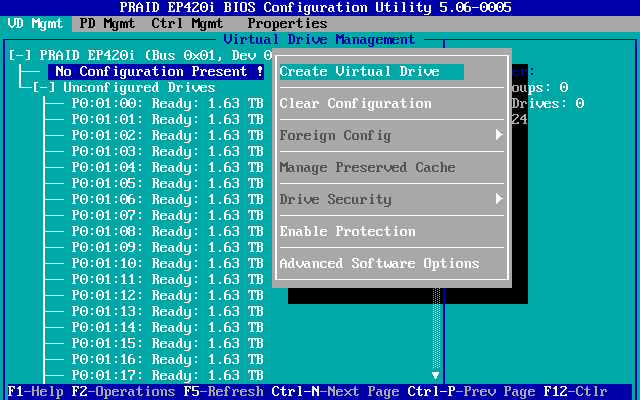
Press <F2> to open the "Operations" sub menu.
The "Create Virtual Drive" option is already selected. Press <enter> to start building the array.
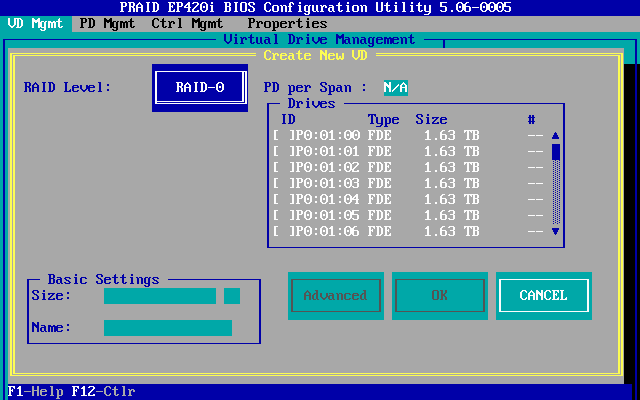
| Note: Please note, we are going to create a RAID level 6 array with two hot-spare drives. You may well be creating a different configuration. Please adapt as necessary. |
The "Create New VD" menu starts with the "RAID Level" set to "0", which is very much not what we want.
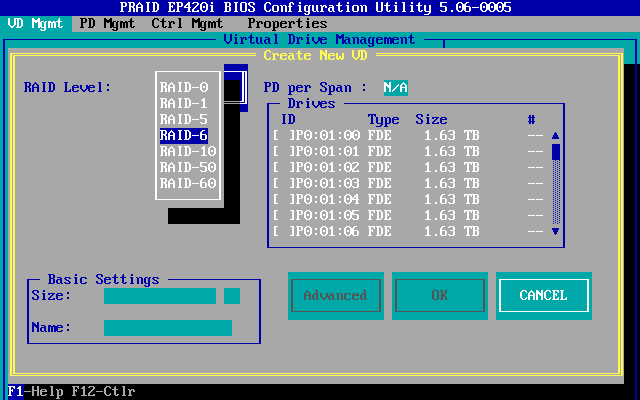
Press "<enter>" to open the RAID level selection list, press '↓' (down) to highlight "RAID-6" and then press '<enter>'.
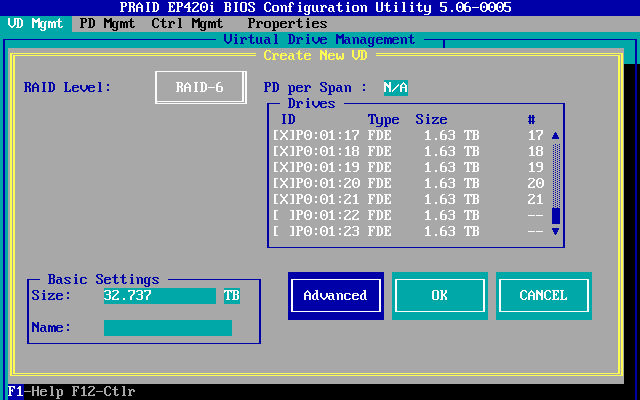
Press the '<tab>' key to switch over to the "Drives" table. Press '' to select (and unselect) each drive, and the '' (up) and '' (down) keys to navigate the available disks.
| Note: If, like us, you are going to have hot-spare drives, do not select them here! |

Once the drives you want to use in the array, minus hot-spares, press '<tab>' (and '<shift> + <tab>' to back up) multiple times until 'Advanced' is selected. Feel free to use a 'Name' if you like. Press '<enter>' to proceed.
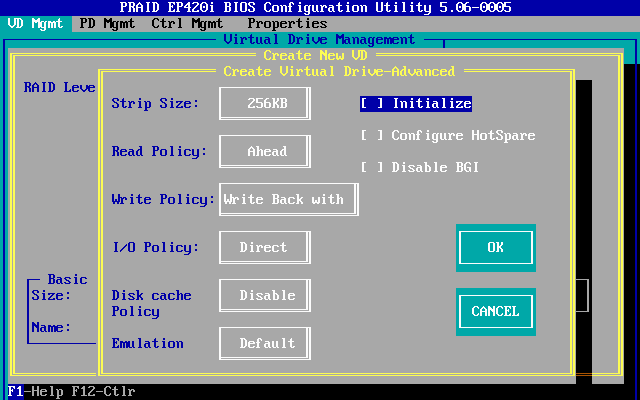
Use '<tab>' to navigate to "[ ] Initialize" and press '<space>' to enable.
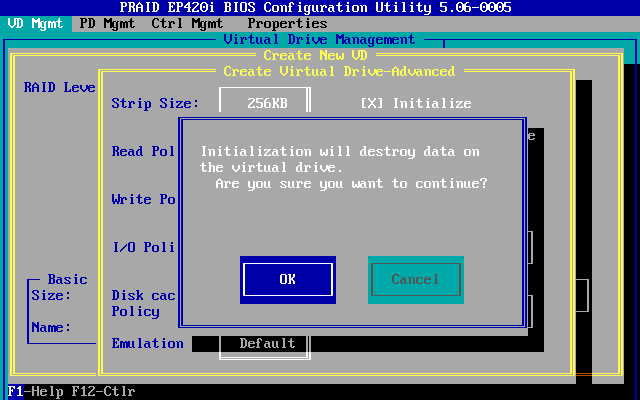
| Warning: If you are rebuilding a previous (unencrypted) array, then DO NOT initialize your array! This process destroys any and all existing data on the array. |
We're building a new array, so in our case (and most often), initialization is desired. Press '<tab>' to select the "OK" button and press '<enter>'.
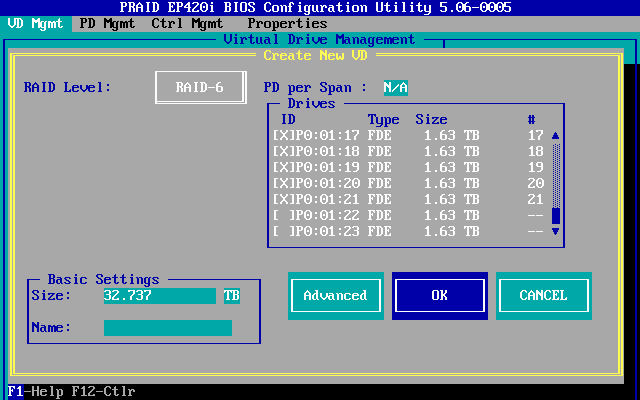
Back on the main array menu, '<tab>' to 'OK' and press '<enter>'.
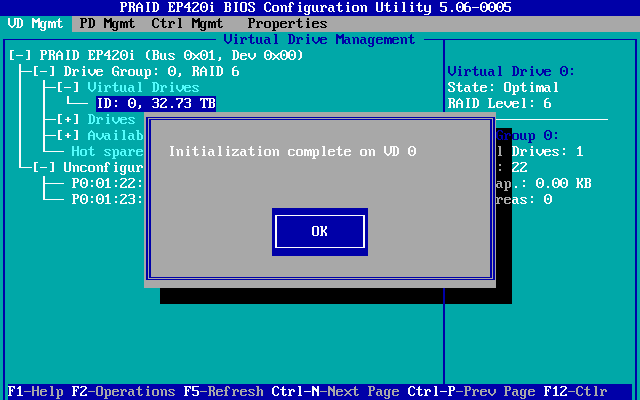
Shortly after returning to the main menu, a window will pop up telling you that the initialization has completed. Press '<enter>' to close the window.
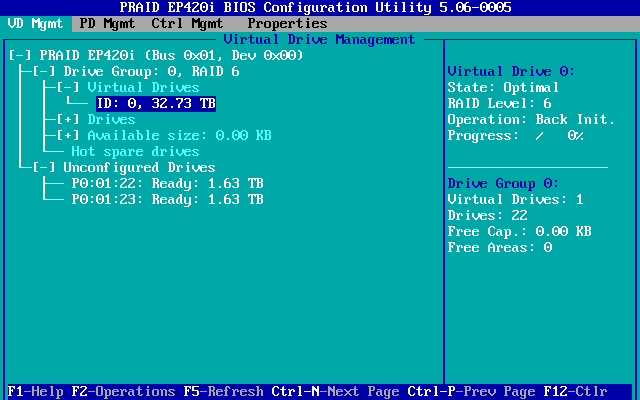
The array is now built!
Do note that the 'Operation: Back Init. Progress' will slowly run. You will also note that the drives will have their activity LEDs blink for some time. This is because, after the initial initialization is complete, a full background initialization is performed. Until this is complete, disk performance will be degraded. Roughly 30% of the disk performance is allocated for this background initialization.
Configure Hot Spares
A "hot spare" is a drive physically in a node that is configured to automatically replace a drive that is in an array that fails. In this way, the array returns to a fully operational state with minimal time in a degraded state.
Hot spares can either be allocated to a specific array (when you have two or more), or it can be a "global" hot spare (GHS). A global hot spare can then be allocated to any array on the node.
In our case, we have only one array, so functionally there is no difference. We will use 'global hot spare' here.
We could have allocated a hot-spare during the assembly of the array above, but in my case, I want two hot spares.
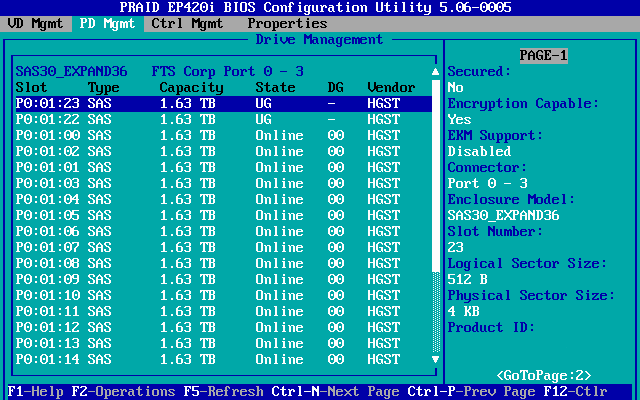
| Note: Press '<ctrl> + n' to switch to the next page, and '<ctrl> + p' to navigate back to the previous page. |
Press '<ctrl> + n' to change to the "PD Mgmt" page. Here, we see a list of drives, with the top two listed as "UG" (Unconfigured, Good).
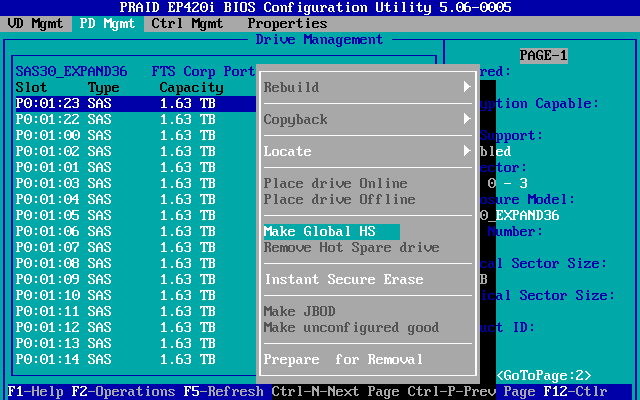
Highlight one of the "UG" disks to open the "Operations" menu. Navigate down to "Make Global HS" and press '<enter>'.
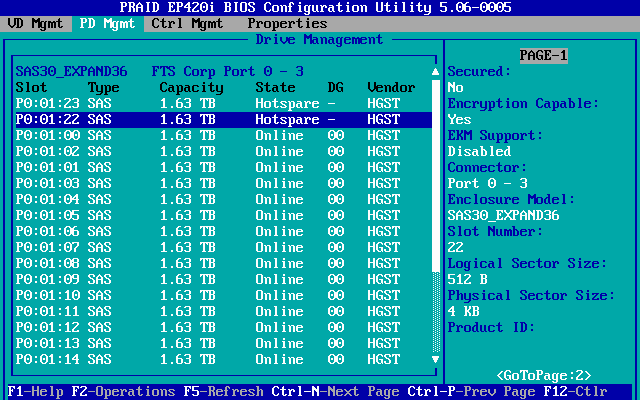
Repeat this for the second "UG" drive. Both will then be marked as "Hotspare".
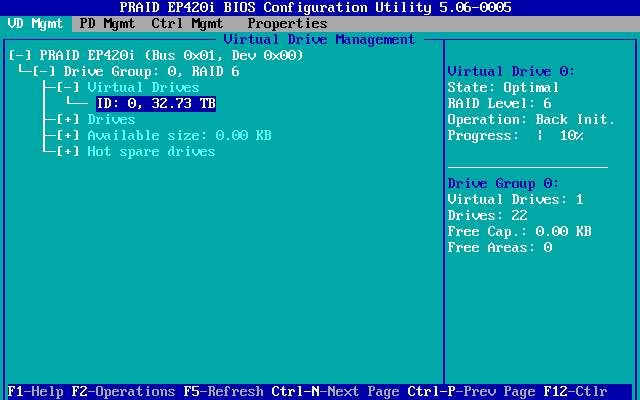
Now there are no more unconfigured drives.
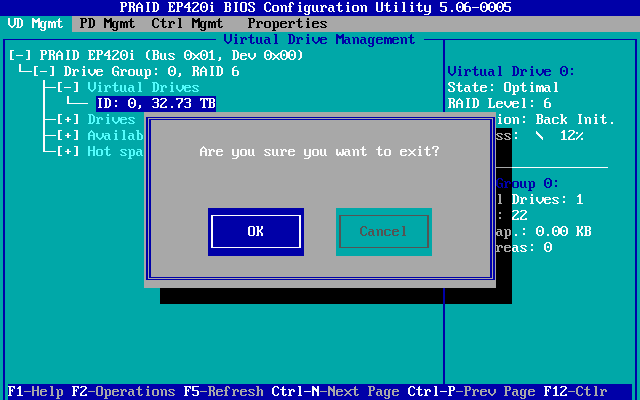
Press '<esc>' to exit, navigate to 'OK' and press '<enter>' to exit.
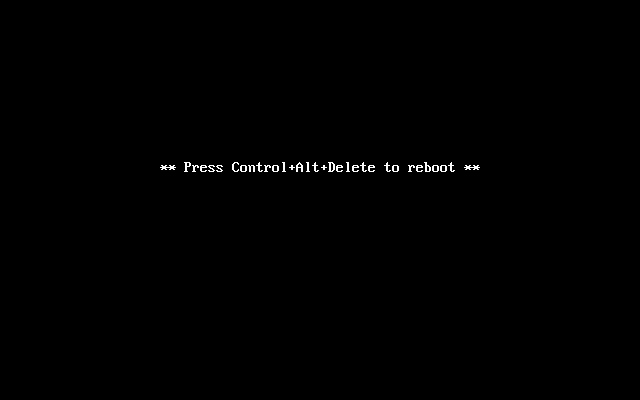
Press '<ctrl> + <alt> + <del>' to reboot the node now.
On the next boot, your new array will be ready for data!
WebBIOS
Building a RAID Array
I know, I have no idea why it's called a "web" BIOS either.
Encryption
If you plan to use encryption, please review this tutorial first:
Booting into the WebBIOS
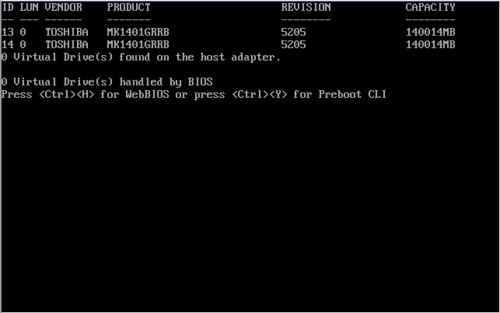
After the main system BIOS is done booting, you will see the hardware RAID controller BIOS start up.
It can take a minute, and this is normal.
Once started, the controller will scan for attached drives and then present an option to press '<ctrl> + <h>' to enter the "WebBIOS". Do so.
Selecting a Controller
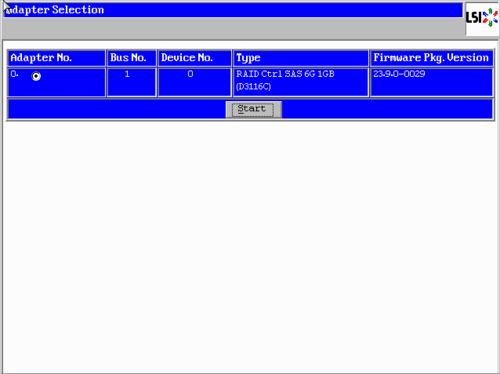
The first screen you will see is one that asks you to choose which adapter you want to configure.
Most machines have only one adapter installed, so there is nothing to choose, really.
Press 'Start'.
Building an Array
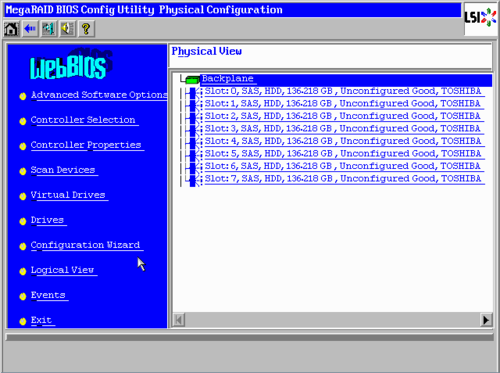
Here we see a controller with eight 136.2 GiB (146 GB) hard drives. Your array will almost certainly be different, but the general look will be the same.
To build the array, click on "Configuration Wizard" on the left panel.
New Configuration
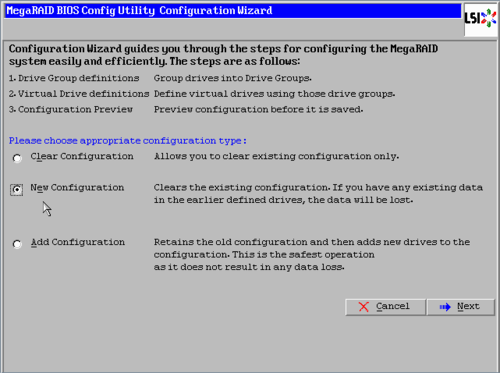
This is a new array and there is no existing configuration, so both "New Configuration" and "Add Configuration" will do the same thing.
The difference is that, if there was an existing array, "New Configuration" would delete it where "Add Configuration" would let you build a second (or third or ...) array.
In our case, we'll choose "New Configuration" and then click on 'Next'.
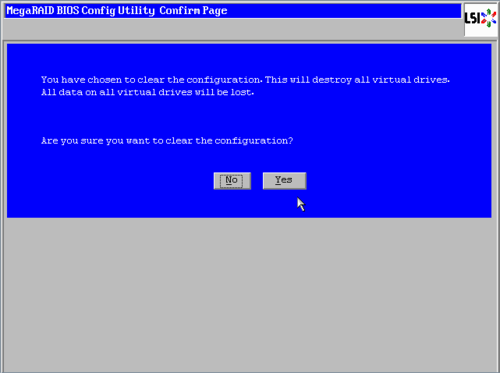
You are warned that this will erase any existing arrays. In our case that is OK, so we'll click 'Yes'
Manual Configuration
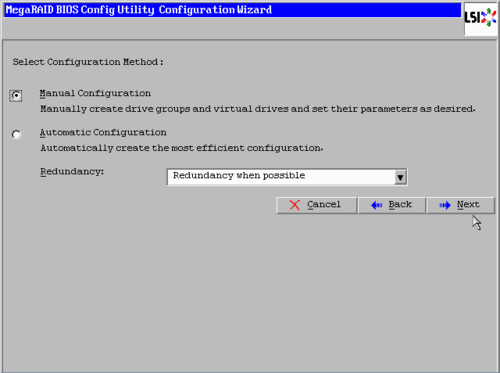
To make life easier, the controller gives you the option of performing an "Automatic Configuration", but we're control freaks.
So we're going to select "Manual Configuration" and the click on 'Next'.
Drive Group
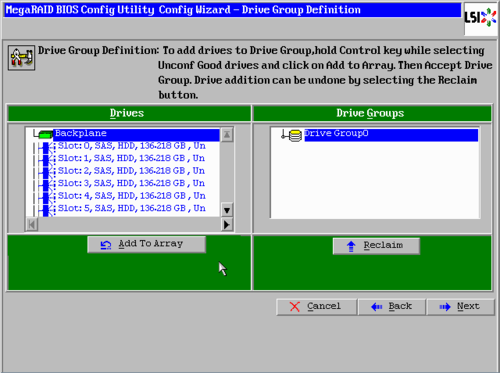
We need to first create a "Drive group", which is the set of drives we want to assemble into an array.
We're going to use all disks to create a single RAID level 5 array.
| Note: We normally would not use RAID level 5 alone, but because the Anvil! mirrors the data across both nodes, we end up with, effectively, RAID level 51. |
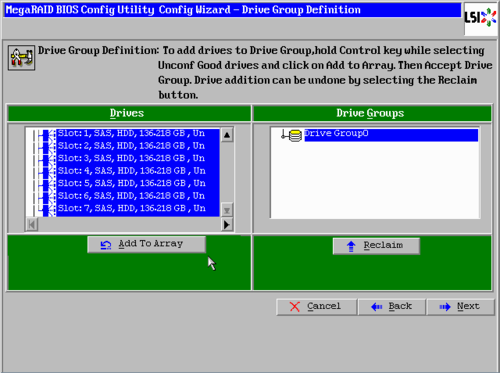
To create a drive group, click on the first drive in the list ("Slot: 0, SAS, HDD, 136.218 GB" in the screen shot above), wait a moment and it will be highlighted in blue.
Then press and hold the '<ctrl>' key and then click on the rest of the drives.
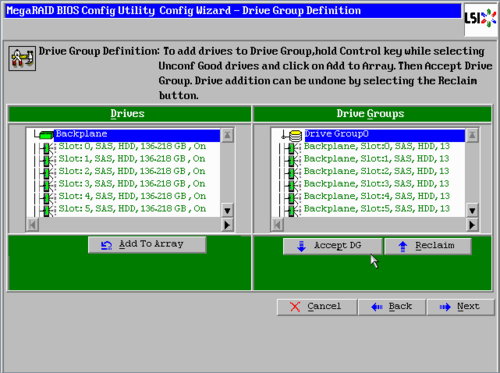
Once all drives are highlighted, click the 'Add to Array' button.
Now all the drives will be shown in the right-side "Drive Groups" window.
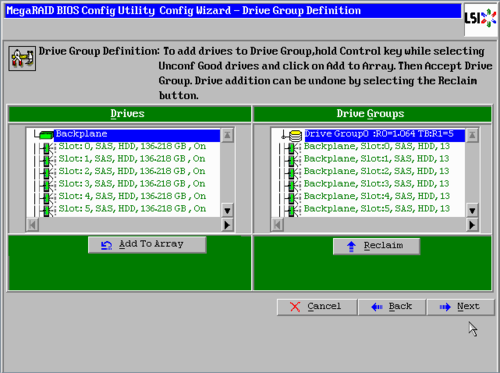
Click on 'Accept DG' to create the drive group.
The page will reload but now the "Accept DG" button is gone, which is good.
Click 'Next' to proceed.
Create SPAN
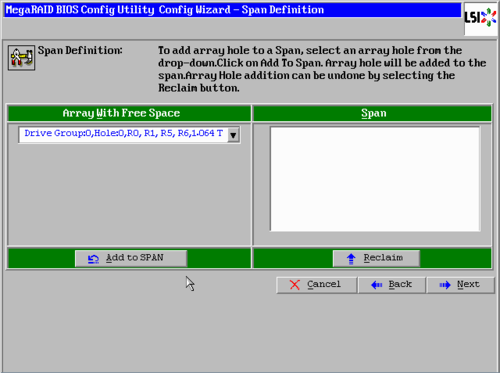
The next page allows us to create "SPAN" (combining two RAID arrays into one combined array, like a mirror of RAID 5 arrays to create a '15' array). We don't need a combined array, so we will create a "SPAN" of just the one array.
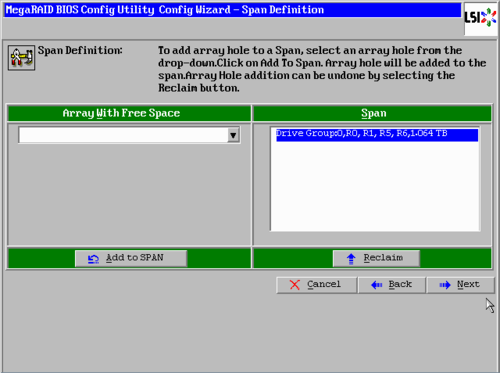
Click on the "Add to SPAN" and then click 'Next'.
Create the Array
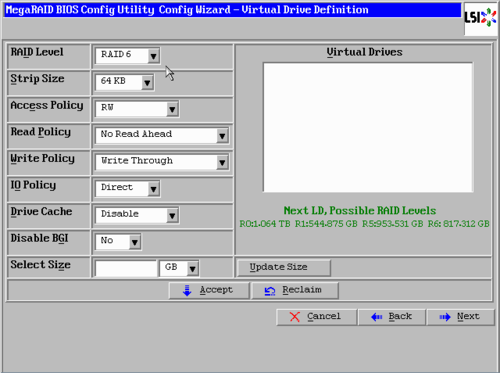
Now we configure the array itself!
By default, the controller suggests RAID level 6. If this was a single-server setup, that would be perfectly sensible.
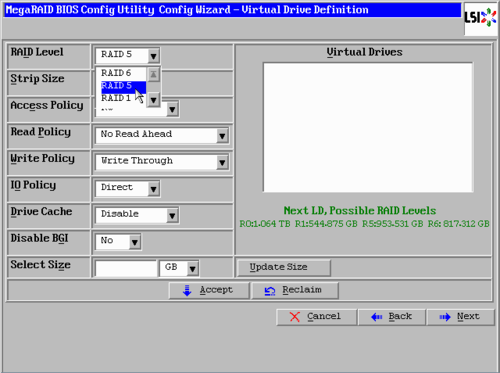
We're mirroring our data across two nodes though, so we can live a little more dangerously and select RAID level 5.
Click on the "RAID Level" select box and change the value to 'RAID 5'
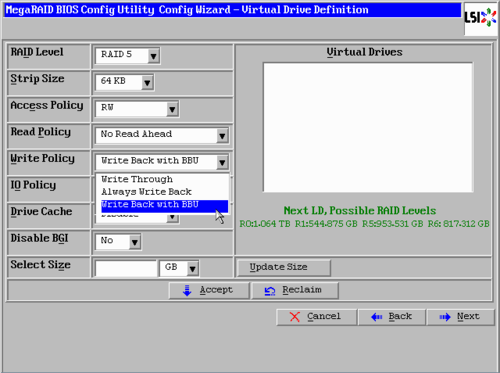
We have a Flash Backup module on our controller that allows us to safely use write-back caching.
The provides a significant performance boost, but it is only safe to use when the flash unit is working. In the past, these was a battery and was called a "Battery Backup Unit" (BBU).
So we can safely click on the "Write Policy" selection box and change the value to "Write Back with BBU".
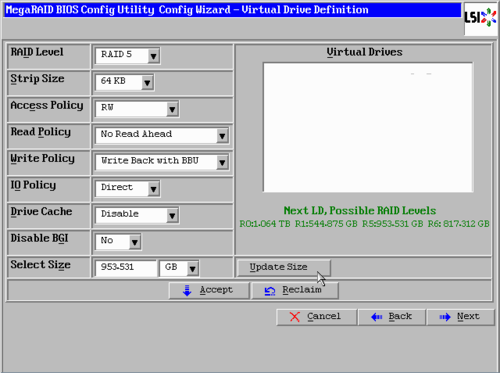
Next, click on the "Update Size" button and the controller will automatically fill out the "Select Size" text field.
Now, click "Accept" to create the array!
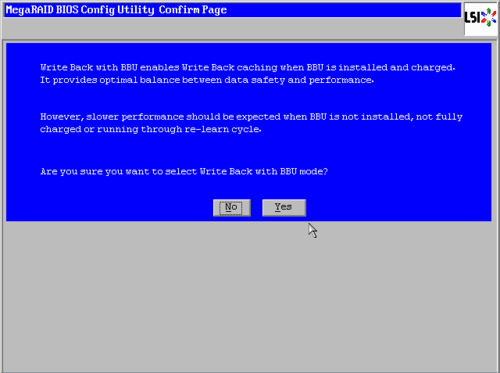
The controller, being ever diligent and terrifying, will warn you about the risks of using write-back caching only when the BBU is healthy.
It notes, rightly, that the performance will degrade should the BBU (well, "FBU" in our case) ever fail. As much as we'd not want to lose performance, this is the only safe option.
Click on 'Yes' to continue.
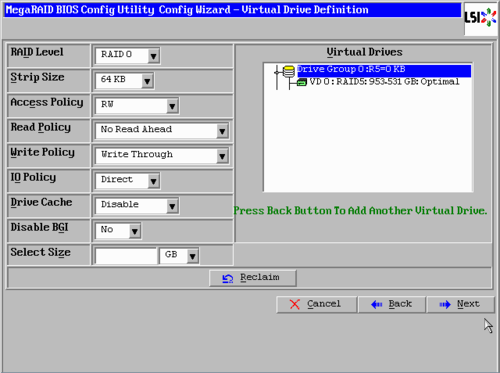
After the warning, it takes us back to the "Virtual Drive Definition" window, but now we see our new array in the right-side "Virtual Drives" window.
Click on 'Next' to finish.
Finishing up
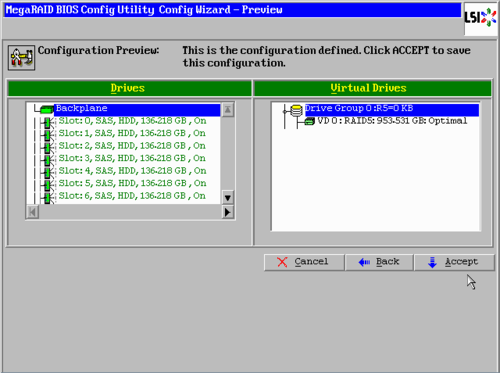
We are taken back to the "Virtual Drives" window and our new array is shown.
Click on "Accept".
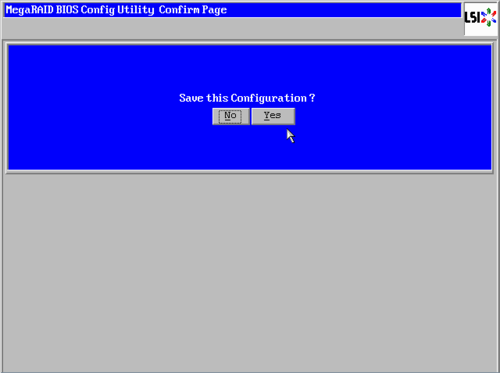
Never one to miss an opportunity to ask a question; We're asked if we want to save the configuration.
Press 'Yes'.
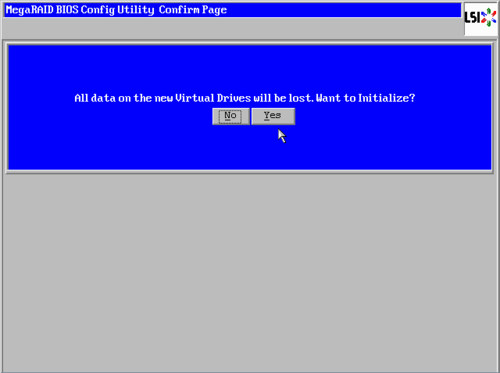
Oh look, another question!
Press 'Yes'.
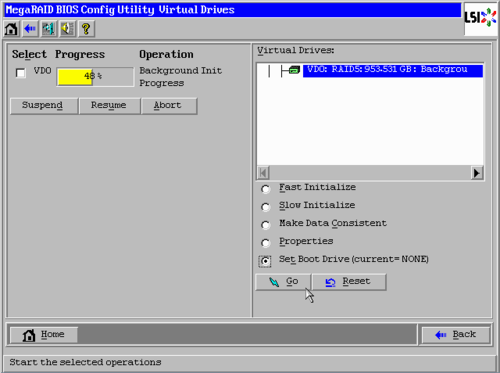
Now we define the array to boot off of.
We only have one array, so this step is arguably not needed. However, should new drives be added in the future and a second array created, this will prevent problems.
Click to select the "Set Boot Drive (current=NONE)" radio button and then click on 'Go'.
| Note: If you get an error saying "Must wait for current operation to complete", then don't worry about setting the boot device. You can come into the WebBIOS and set it later. |
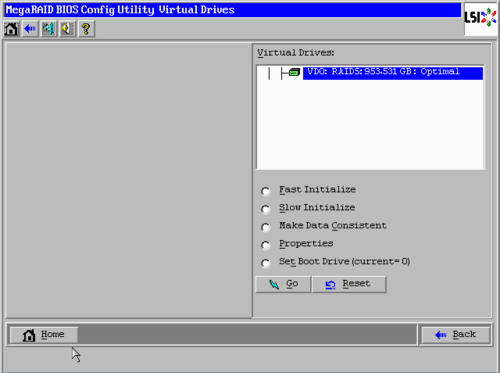
Now that the boot drive is set to '0', we're done!
Click on 'Home' to return to the main menu.
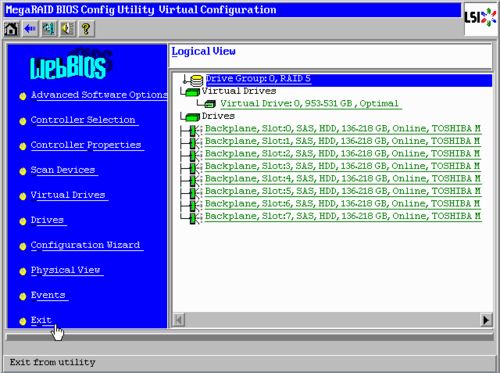
Now we see our shiny new array!
Click on 'Exit', then click 'Yes' and then reboot your machine.
| Any questions, feedback, advice, complaints or meanderings are welcome. | |||
| Alteeve's Niche! | Alteeve Enterprise Support | Community Support | |
| © 2025 Alteeve. Intelligent Availability® is a registered trademark of Alteeve's Niche! Inc. 1997-2025 | |||
| legal stuff: All info is provided "As-Is". Do not use anything here unless you are willing and able to take responsibility for your own actions. | |||

