Building an Anvil m2: Difference between revisions
Created page with "{{howto_header}} {{warning|1=This is incomplete. Please do not follow this tutorial until this warning is removed!}} {{note|1=This is an updated version of [[2-Node Red Hat ..." |
No edit summary |
||
| Line 4: | Line 4: | ||
{{note|1=This is an updated version of [[2-Node Red Hat KVM Cluster Tutorial]] that adds support for the [[AN!CDB]] cluster dashboard. It also uses some tools to simplify the setup of nodes.}} | {{note|1=This is an updated version of [[2-Node Red Hat KVM Cluster Tutorial]] that adds support for the [[AN!CDB]] cluster dashboard. It also uses some tools to simplify the setup of nodes.}} | ||
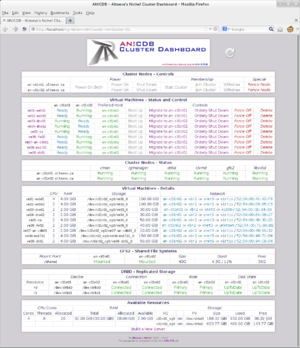
[[File:an-cdb_title-screenshot.png|thumb|300px|right|AN!CDB Anvil Dashboard]] | |||
This tutorial will help you build an Anvil Mark-2. It differs from the [[2-Node Red Hat KVM Cluster Tutorial| previous tutorial]] in that it does not focus on learning the foundation of the cluster. Instead, it's focus is to help you create a reliable platform for your servers. | This tutorial will help you build an Anvil Mark-2. It differs from the [[2-Node Red Hat KVM Cluster Tutorial| previous tutorial]] in that it does not focus on learning the foundation of the cluster. Instead, it's focus is to help you create a reliable platform for your servers. | ||
| Line 27: | Line 29: | ||
== Hardware == | == Hardware == | ||
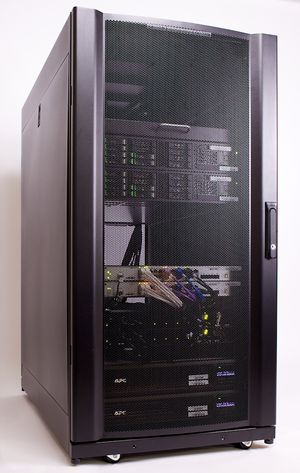
[[File:anvil-m2_rack.jpg|thumb|right|300px|Racked Anvil RN3-m2]] | |||
The hardware used in this tutorial is; | The hardware used in this tutorial is; | ||
| Line 54: | Line 58: | ||
= The Setup = | = The Setup = | ||
The hardware selection and it's configuration may seem overly complex at first, but every component is there for a reason. | |||
== Power == | |||
In order to make the power feeding the Anvil fully fault tolerant, we will use two separate [[UPS]]es powering two separate switched [[PDU]]s. Where facilities exist, we recommend using two separate mains circuits two feed the separate UPSes as well. | |||
If your nodes and devices have redundant power supplies, then you will plug one power supply into the first power rail and then plug the second power supply into the second rail. This way, the loss of power will not interrupt your Anvil at all. | |||
If your devices have just one power supply, then you will plug the first device into the first power rail and the second device into the second power rail. In this case, a power failure will take out half your devices, but the remaining devices will continue to operate on the remaining rail. This will likely cause interruption, so it is not necessarily fault tolerant, but the high-availability nature of the Anvil should mean recovery would be quick and automated. | |||
The need for the switched [[PDU]]s, specifically, is to provide a backup [[fence]] device. The importance of this will be covered in more detail shortly. | |||
== Network == | |||
Revision as of 19:05, 26 February 2013
|
Alteeve Wiki :: How To :: Building an Anvil m2 |
| Warning: This is incomplete. Please do not follow this tutorial until this warning is removed! |
| Note: This is an updated version of 2-Node Red Hat KVM Cluster Tutorial that adds support for the AN!CDB cluster dashboard. It also uses some tools to simplify the setup of nodes. |

This tutorial will help you build an Anvil Mark-2. It differs from the previous tutorial in that it does not focus on learning the foundation of the cluster. Instead, it's focus is to help you create a reliable platform for your servers.
Think of this tutorial as a recipe for making a great cake, rather than learning the chemistry behind baking.
Before We Start
The Task Ahead
We will be building up two servers, on redundant power and networking, to create a highly-available, highly fault-tolerant platform for virtual servers.
It will be built on 100% open-source software.
Specifically, we will be using;
- Red Hat Enterprise Linux or CentOS version 6.
- Red Hat Resilient Storage (including High-Availability Add-On) for automatic recovery
- KVM + qemu as the hypervisor
- Linbit's DRBD for replicated storage.
- AN!CDB for Anvil m2 management.
- AN!CM for hardware health monitoring.
Hardware

The hardware used in this tutorial is;
- Two Fujitsu RX300 S6 nodes with redundant power supplies.
- Two D-Link DGS-3120-24TC/SI switches, stacked.
- Two APC AP7900 switched PDUs.
- Two APC SMT1500 UPSes, each with an AP9630 network management card.
- One ASUS EeeBox EB1021 appliance server for the AN!CDB dashboard.
You may, of course, use other hardware. However, you need to ensure a few things;
- Your nodes need to have out-of-band management. This is usually provided via an IPMI controller, or an OEM version, like HP's iLO, Dell's iDRAC or similar.
- Your switches need to support persistent multicast groups. Most simple, unmanaged switches do this. Some higher-end ones require static multicast groups be assigned.
- Your switched PDU needs to have a fence agent usable by the cluster. You can check here if yours does.
- In order to monitor the UPSes, you need to use a network-able UPS that supports apcupsd.
- AN!CDB needs to run on a 64-bit CPU and on a machine that properly supports RHEL6 with at least two network cards.
If you run into problems using other hardware, please contact us and we will do our best to help get the Anvil m2 working on your platform.
Prerequisites
This tutorial assumes it's readers be familiar with basic command-line Linux tools. You will need to be familiar with networking concepts and terms. It uses vim as the default editor, though readers can safely substitute their preferred text editor, provided it uses standard unix-style line wrapping. Where ever possible, commands and shortcuts will be explained in detail.
The Setup
The hardware selection and it's configuration may seem overly complex at first, but every component is there for a reason.
Power
In order to make the power feeding the Anvil fully fault tolerant, we will use two separate UPSes powering two separate switched PDUs. Where facilities exist, we recommend using two separate mains circuits two feed the separate UPSes as well.
If your nodes and devices have redundant power supplies, then you will plug one power supply into the first power rail and then plug the second power supply into the second rail. This way, the loss of power will not interrupt your Anvil at all.
If your devices have just one power supply, then you will plug the first device into the first power rail and the second device into the second power rail. In this case, a power failure will take out half your devices, but the remaining devices will continue to operate on the remaining rail. This will likely cause interruption, so it is not necessarily fault tolerant, but the high-availability nature of the Anvil should mean recovery would be quick and automated.
The need for the switched PDUs, specifically, is to provide a backup fence device. The importance of this will be covered in more detail shortly.
Network
| Any questions, feedback, advice, complaints or meanderings are welcome. | |||
| Alteeve's Niche! | Alteeve Enterprise Support | Community Support | |
| © 2025 Alteeve. Intelligent Availability® is a registered trademark of Alteeve's Niche! Inc. 1997-2025 | |||
| legal stuff: All info is provided "As-Is". Do not use anything here unless you are willing and able to take responsibility for your own actions. | |||

