Managing Drive Failures with AN!CDB
|
Alteeve Wiki :: How To :: Managing Drive Failures with AN!CDB |
| Note: At this time, only LSI-based controllers are supported. Please see this section of the AN!Cluster Tutorial 2 for required node configuration. |
The most common repair needed on Anvil! nodes is the replacement of failing or failed physical disks.
AN!CDB provides a very easy to use interface for managing this. In this tutorial, we will physically eject a drive from a small running logical volume, simulating a failure.
Introducing AN!CDB Drive Management
On the main AN!CDB page, you can click on either node's name in the "Cluster Nodes - Control" section.
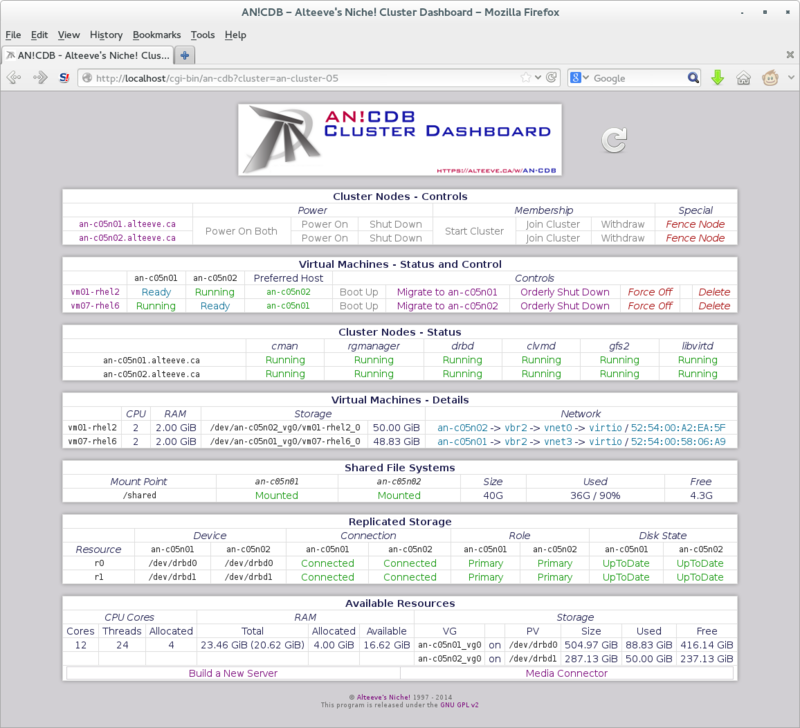
Click on the name of the node you want to work on. In our case, we will work on an-c05n01.alteeve.ca.
Storage Display Window
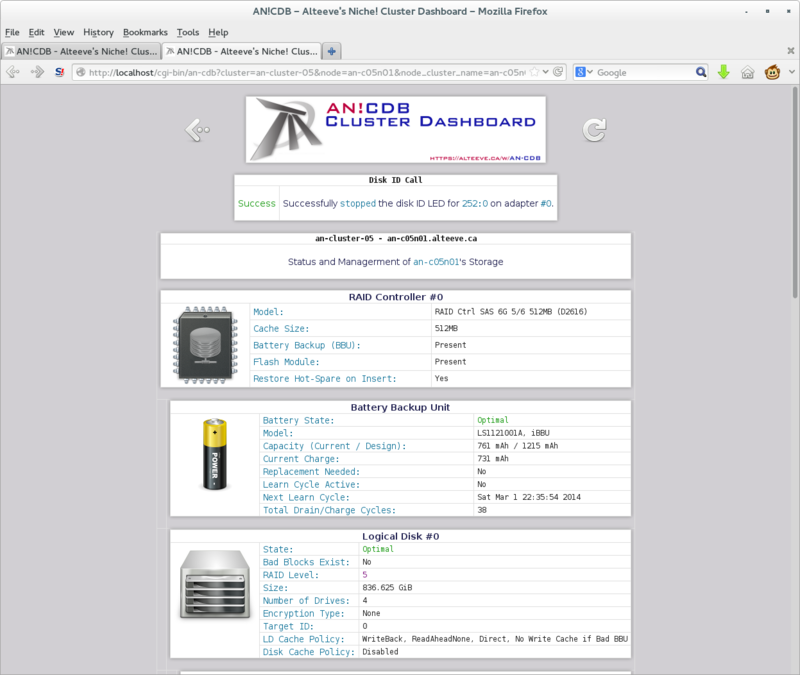
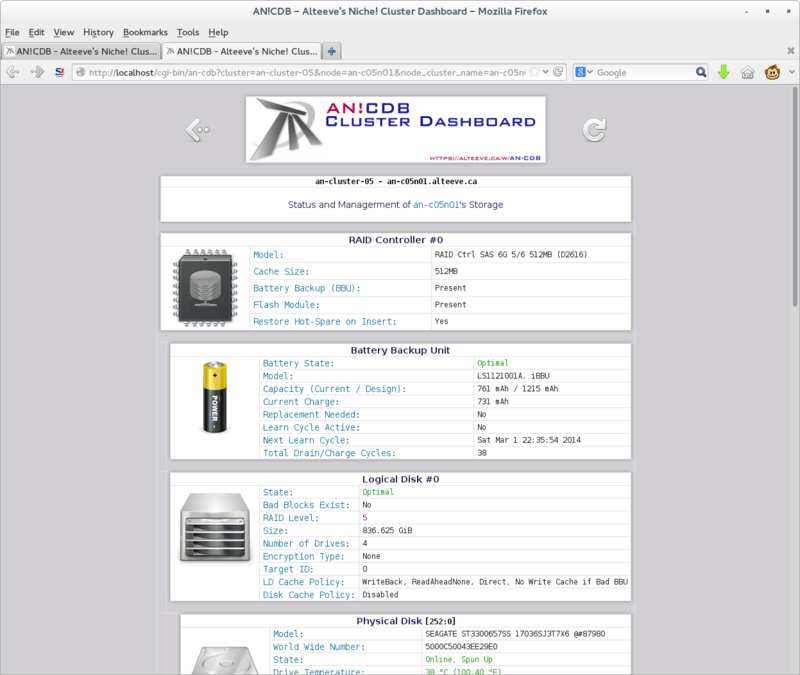
The storage display window shows your storage controller(s), their auxiliary power supply for write-back caching if installed, the logical disk(s) and each logical disk's constituent drives.
The auxiliary power and logical disks will be slightly indented under their parent controller.
The physical disks associates with a given logical disk are further indented, to show their association.
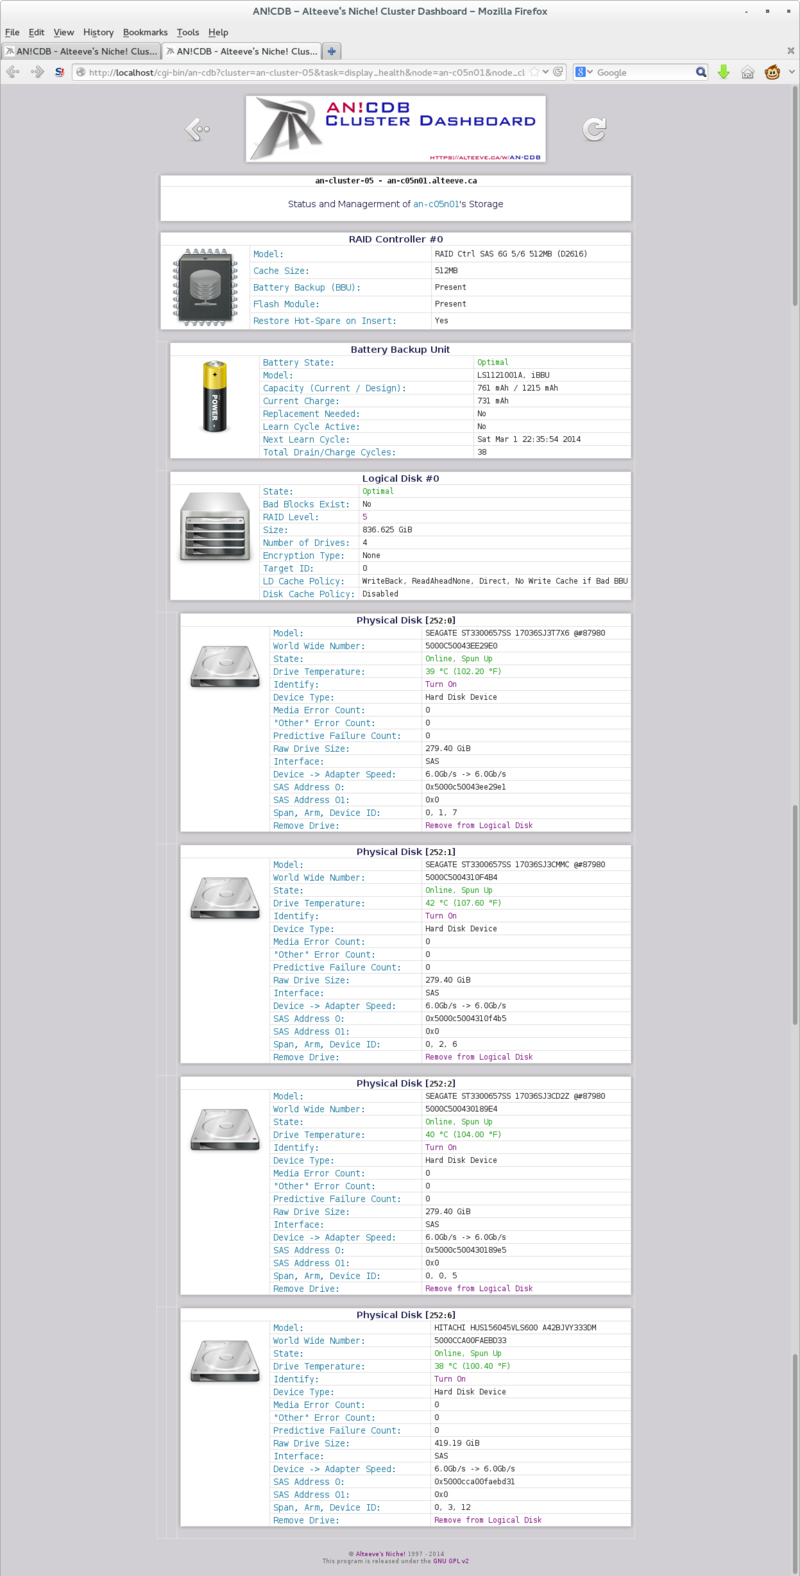
In this example, we have only one RAID controller, it has an auxiliary power pack and a single logical volume has been created.
The Logical volume is a RAID level 5 array with four physical disks.
Managing the Physical Disk Identification ID Light
The first task we will explore is using identification lights to find a physical drive in a node.
If a drive fails completely, it's fault light will light up, making the failed drive easy to find. However, the AN!CDB alert system can notify us of pending failures.
In these cases, the drive's fault light may not illuminate. So it becomes critical to identify the failing drive. Removing the wrong drive, when another drive is unhealthy, may well leave your node non-operational.
That's no fun.
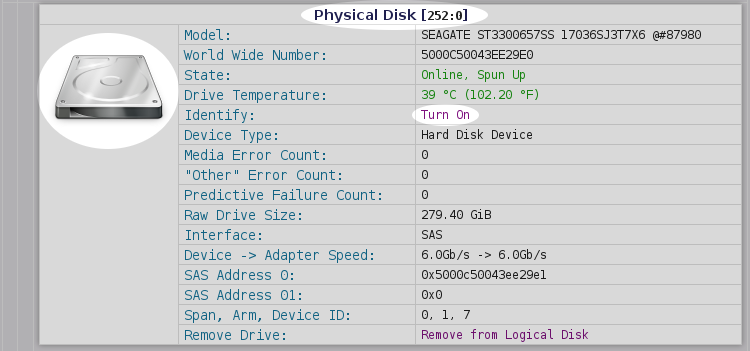
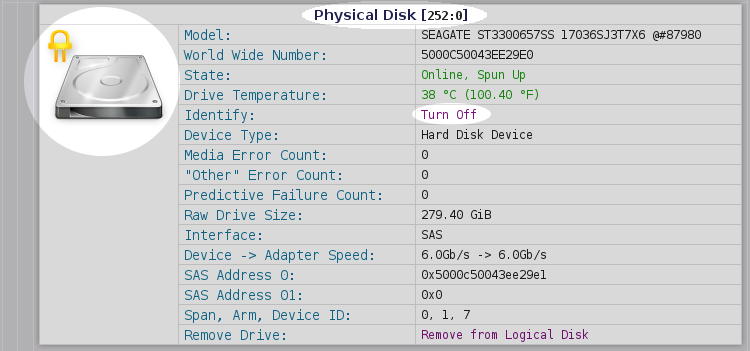
Each physical drive, whether in an array or unconfigured, will have a pair of buttons labelled Turn On and Turn Off. Which you click will determine if the drive's ID light illuminates or turns off.
Illumination a Drive's ID Light
Let's illuminate!
We will identify the drive with the somewhat-cryptic name '252:0'.
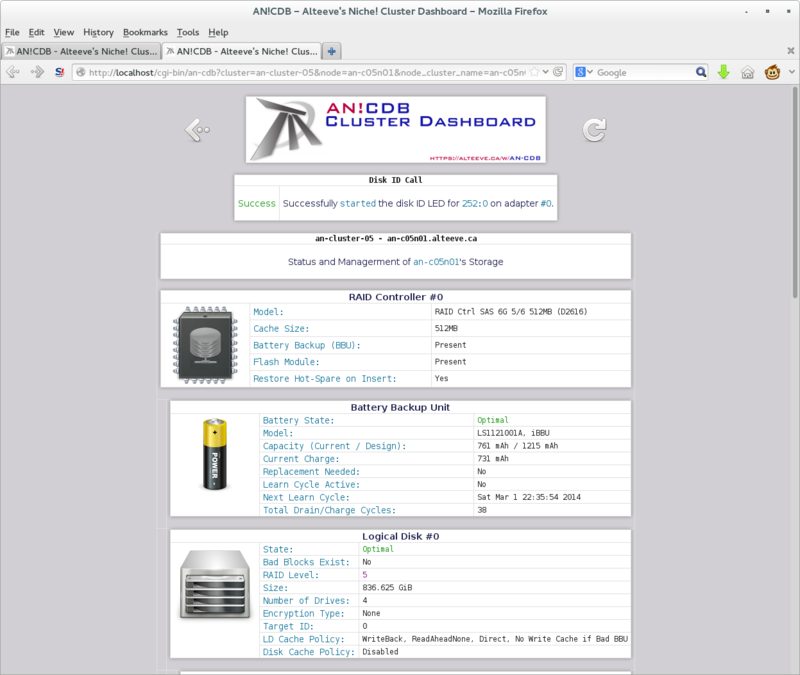
The storage page will reload, indicating whether the command succeeded or not.
If you now look at the front of your node, you should see one of the drives lit up.
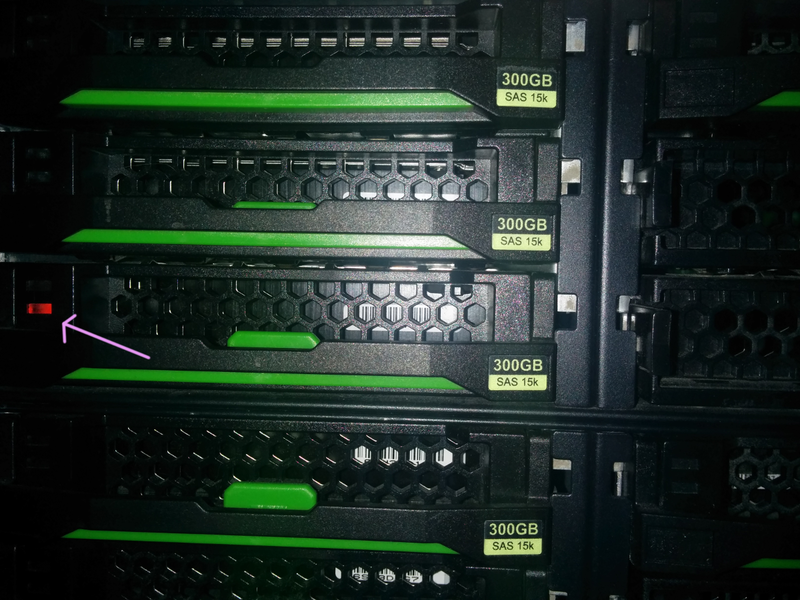
Most excellent.
Shutting off a Drive's ID Light
To turn the ID light off, simply click on the drive's Turn Off button.
As before, the success or failure will be reported.
Refreshing The Storage Page
After issuing a command to the storage manager, please do not use your browser's "refresh" function. It is always better to click on the reload icon.
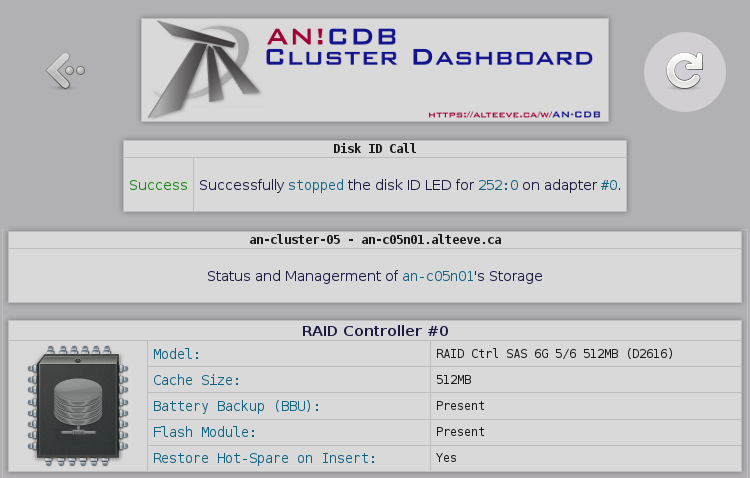
This will reload the page with the most up to date state of the storage in your node.
Failure Recovery
Now the fun part; Breaking things!
Failing a Drive
For this tutorial, we will physically eject the drive we identified earlier, called '252:0', which is a member of the logical drive #0. This will cause the logical drive to enter a degraded state and the ejected drive will completely vanish from the storage page.
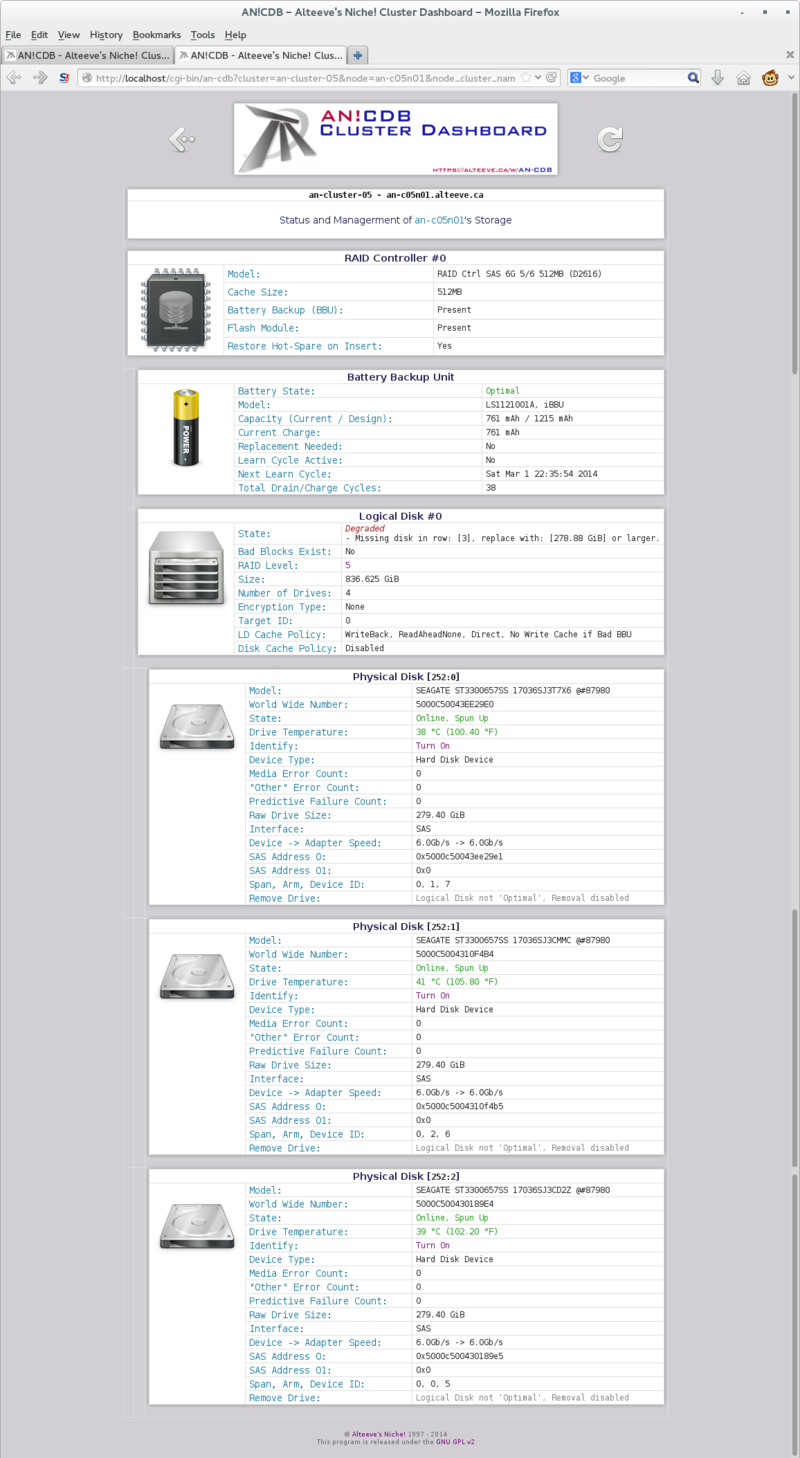
Now we will eject the drive.
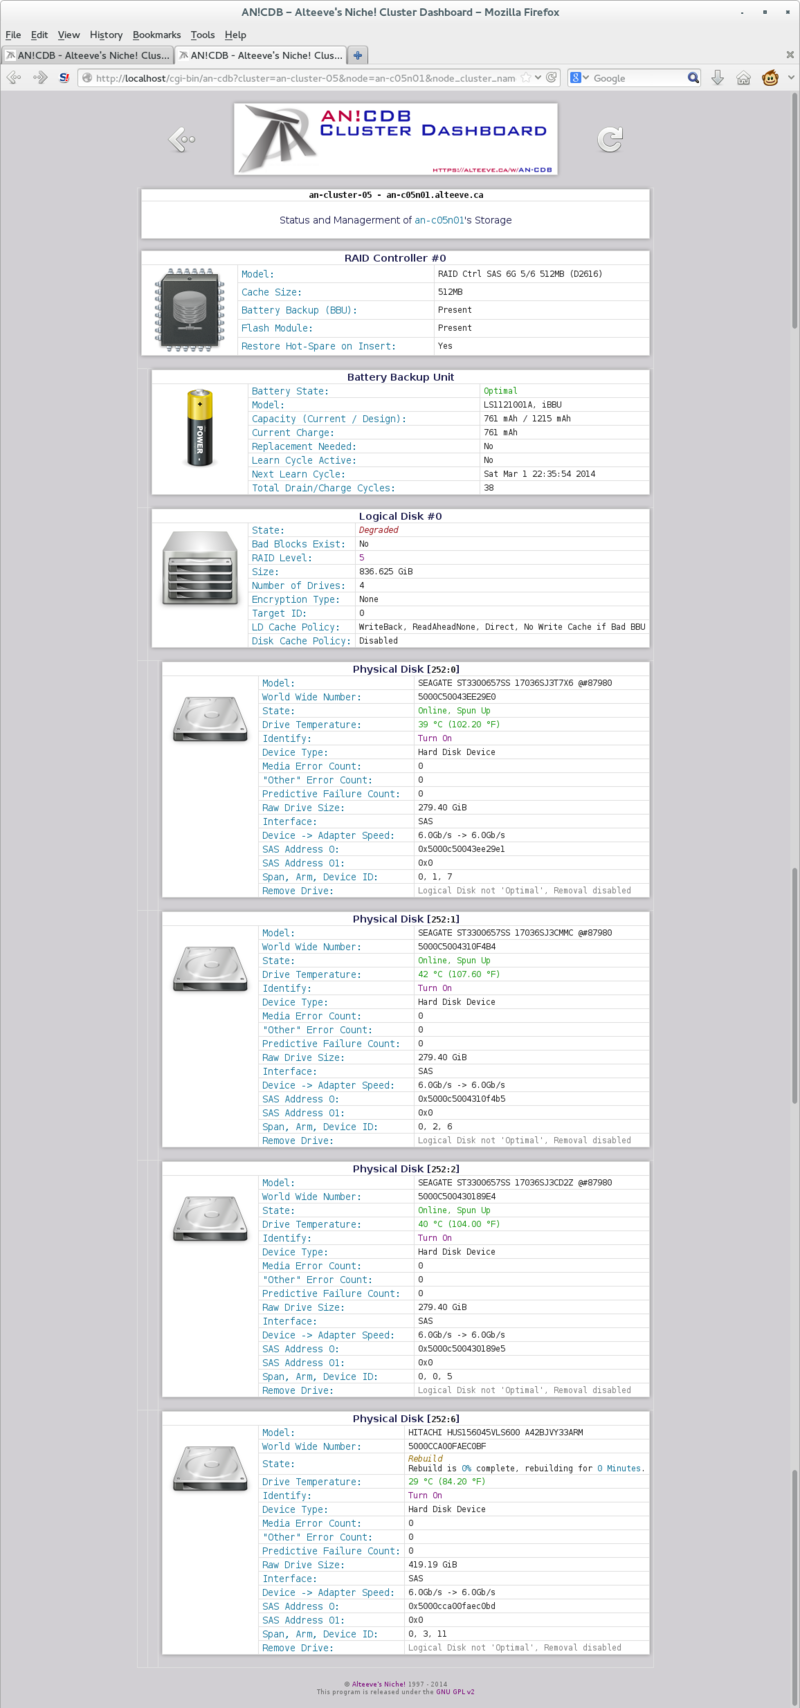
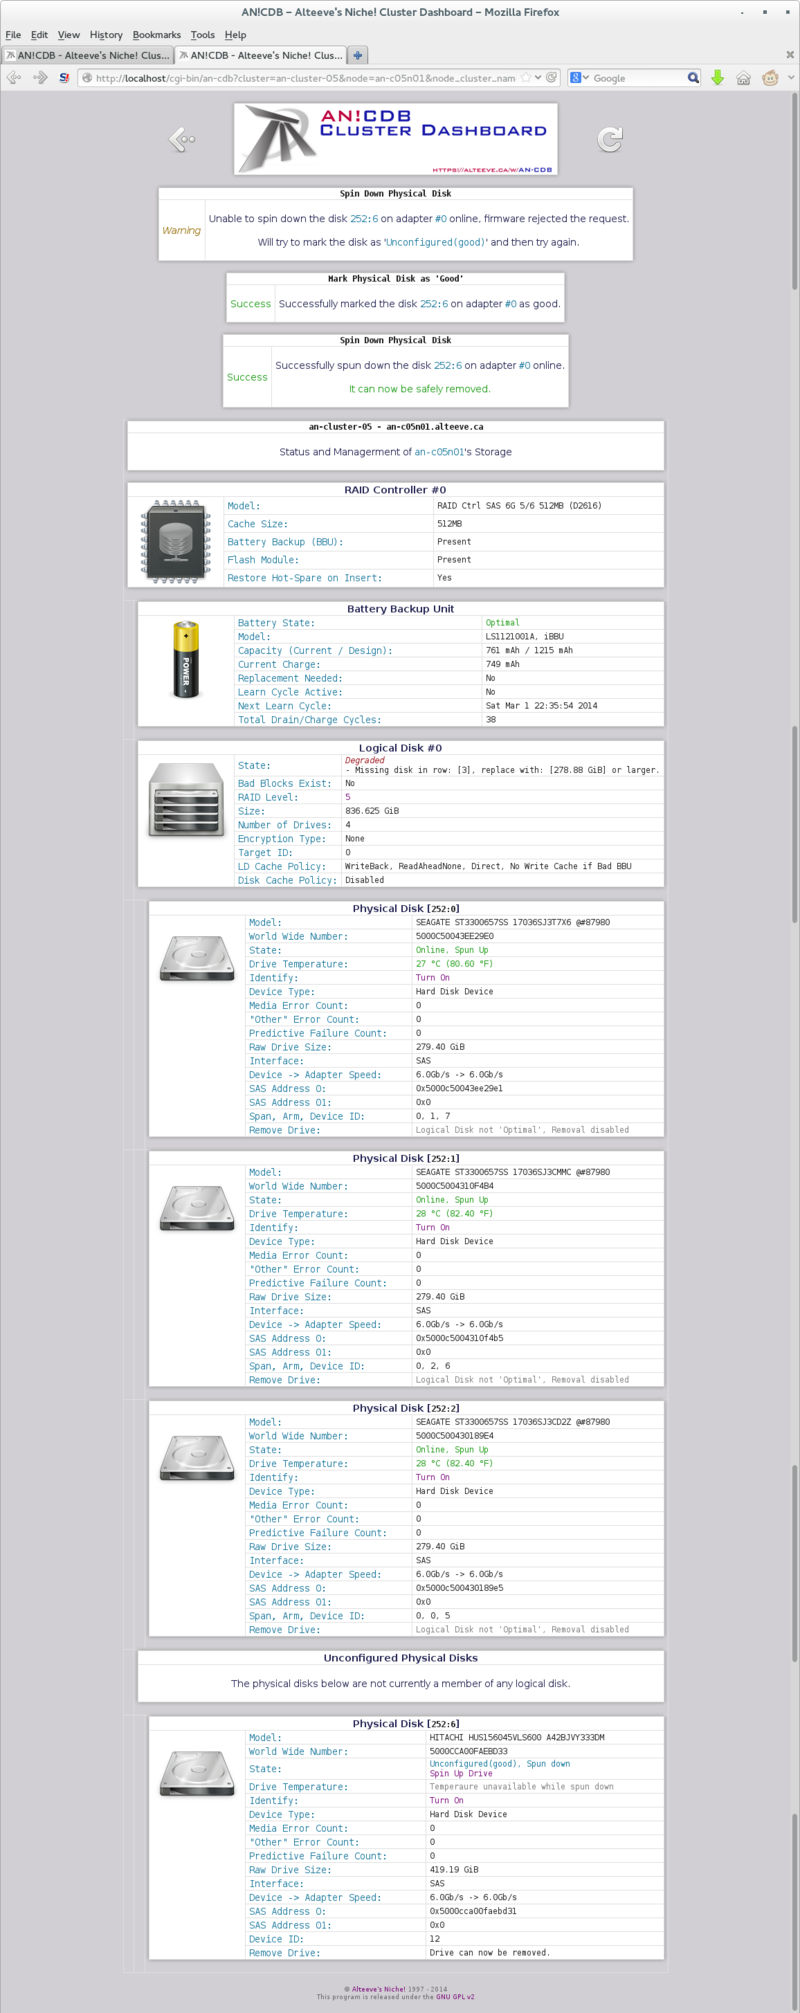
Notice how 252:0 is gone and how the logical drive's state is now Degraded?
Underneath the "Degraded" state is more detail on which drive is missing and how big the replacement drive has to be.
Recovering the Ejected Disk
In our case, we know that the drive we ejected is healthy, so we will re-insert it into the bay.
If your drive really has failed, then remove the drive and insert the new replacement drive.
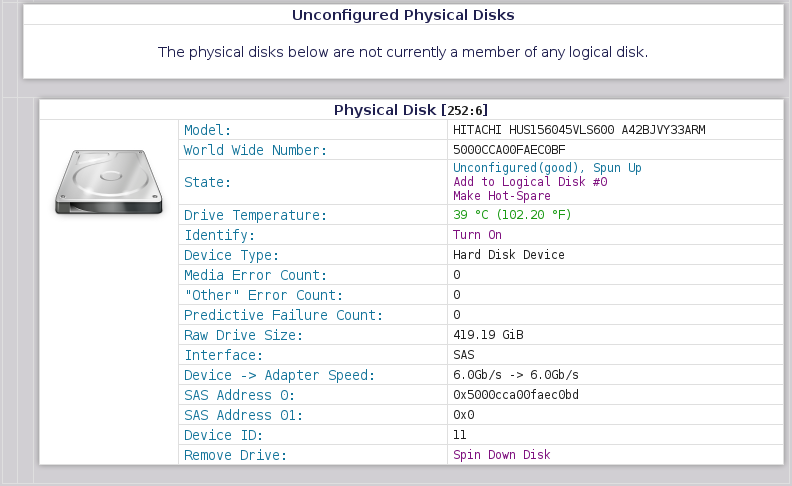
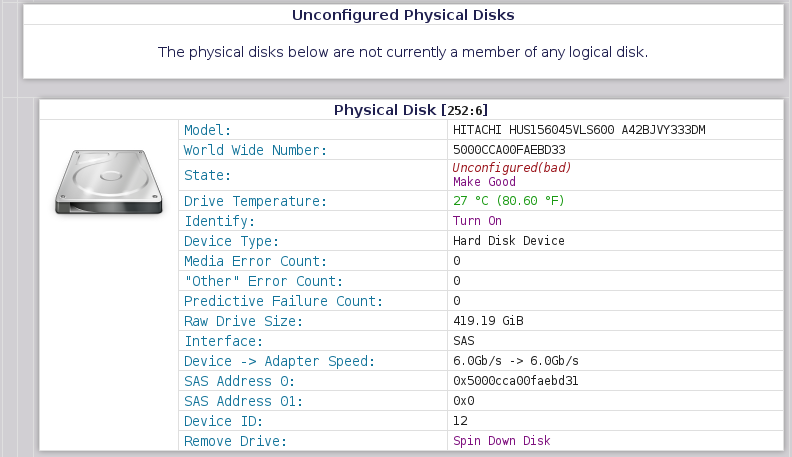
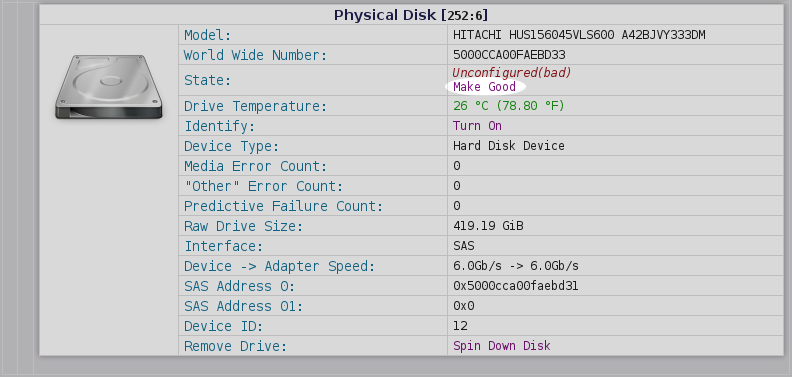
Once inserted, the drive will be marked by the controller as Unconfigured(bad). It will also be listed as an "Unconfigured Physical Disk".
| Warning: If the drive was marked bad automatically by the controller, do not try to repair it. Replace it! |
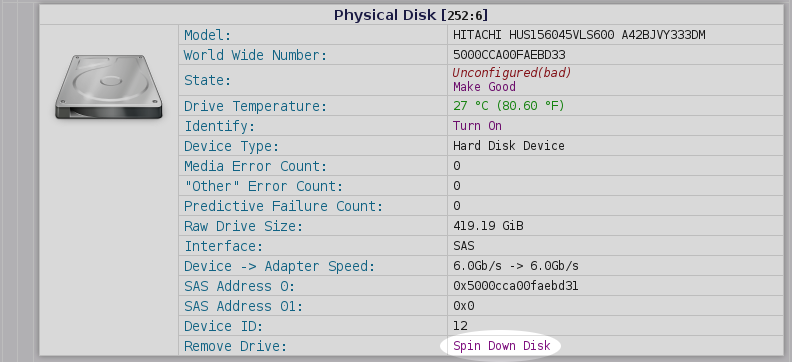
In this state, the physical drive is useless. Before we can use it, we must click on the Make Good link by the drive's State.
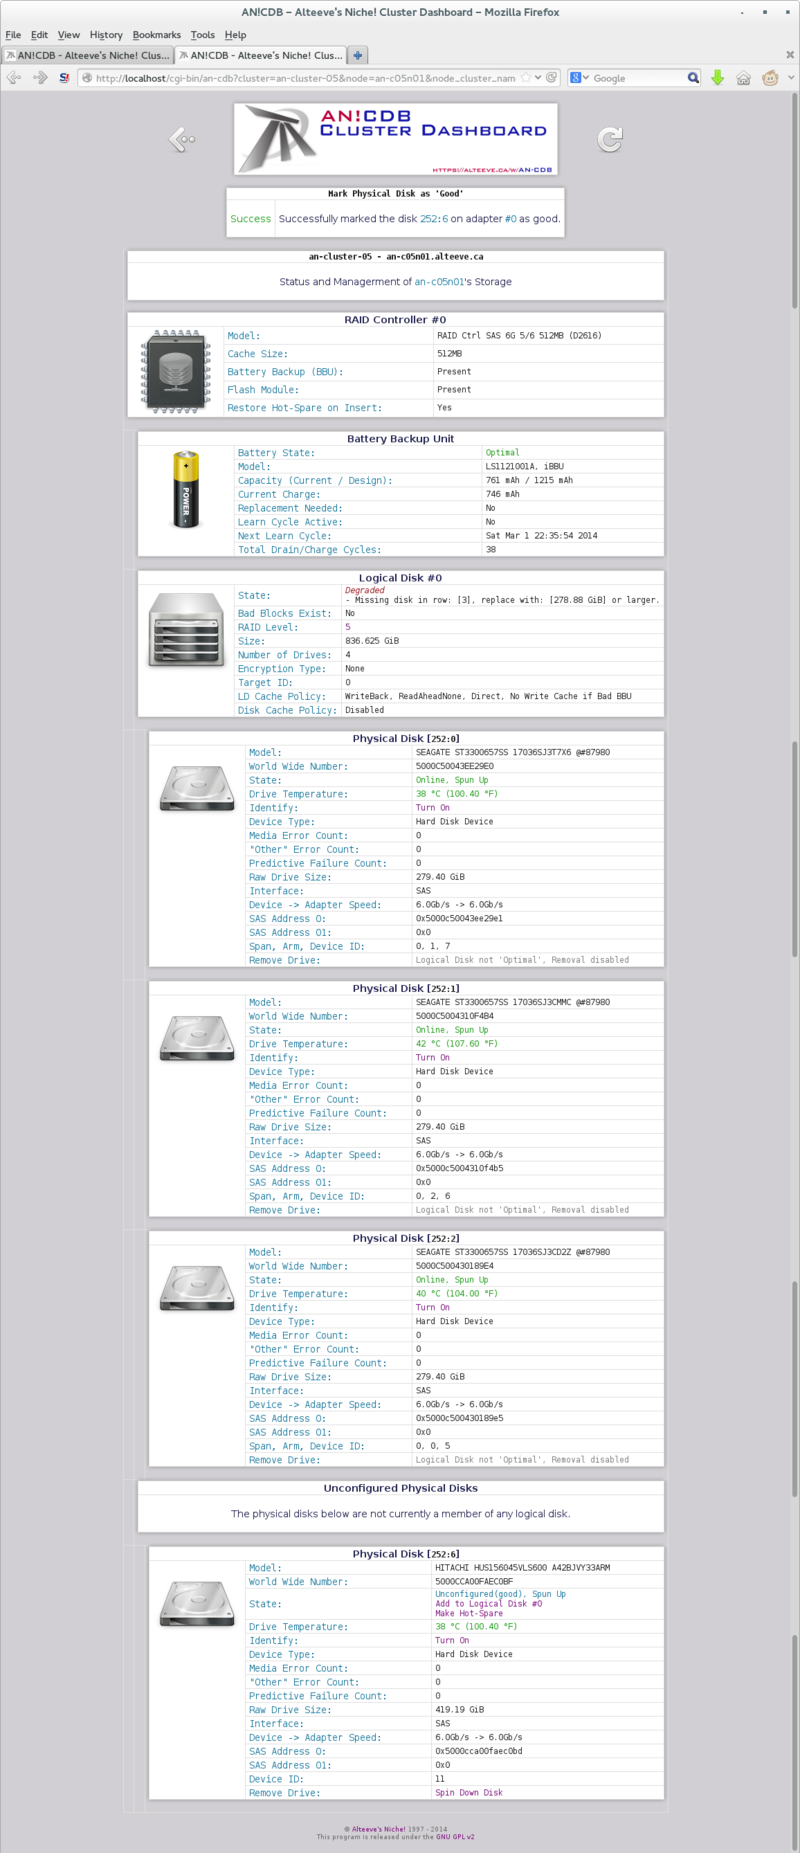
Once you click on the Make Good, the drive will be flagged as healthy.
Now the physical disk is usable again.
Adding the Recovered/Replacement Drive to the Degraded Array
Whether you replaced a truly bad drive or flagged an ejected drive as good again, the new drive may not automatically be added to the degraded array.
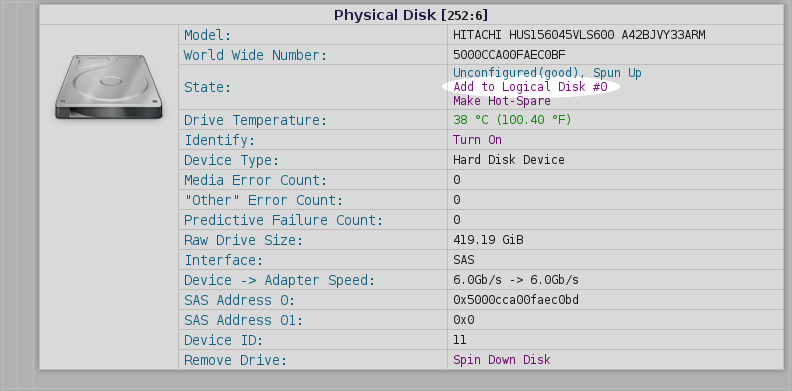
When the storage manager sees a degraded array, it looks for healthy drives not yet in an array. When found, the healthy drive's size is checked. If it is large enough to replace the lost drive, a button called "Add to Logical Disk #x" will be shown. If there are multiple degraded arrays, the option of which array to add the disk to will be shown as multiple buttons.
Once you click on the "Add to Logical Disk #0" button shown above, the drive will be added and array recovery will start.
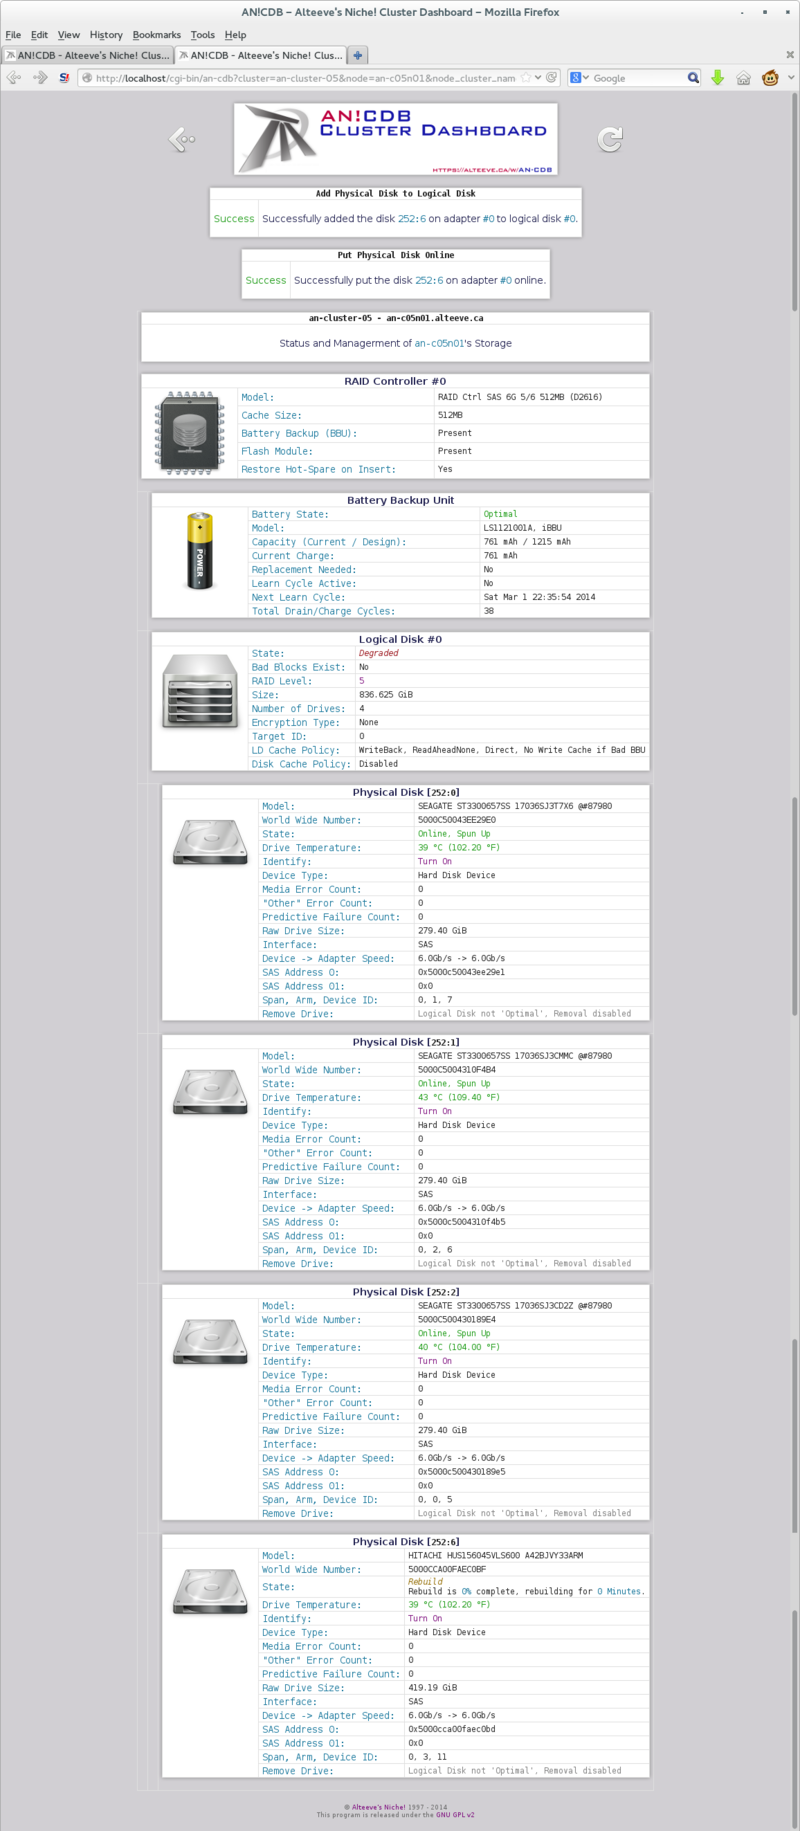
Immediately, we'll see that the rebuild of the freshly inserted physical disk has begun.
Good time to go grab a $drink.
Monitoring Drive Rebuild
Rebuilding can take a fair bit of time. How long exactly depends on the complexity of the RAID level used, the size of the physical disk that was inserted and the configuration of the controller.
In my case, the rebuild took about 30 minutes.
That's it!
The logical drive is fully restored.
| Any questions, feedback, advice, complaints or meanderings are welcome. | |||
| Alteeve's Niche! | Alteeve Enterprise Support | Community Support | |
| © 2025 Alteeve. Intelligent Availability® is a registered trademark of Alteeve's Niche! Inc. 1997-2025 | |||
| legal stuff: All info is provided "As-Is". Do not use anything here unless you are willing and able to take responsibility for your own actions. | |||

